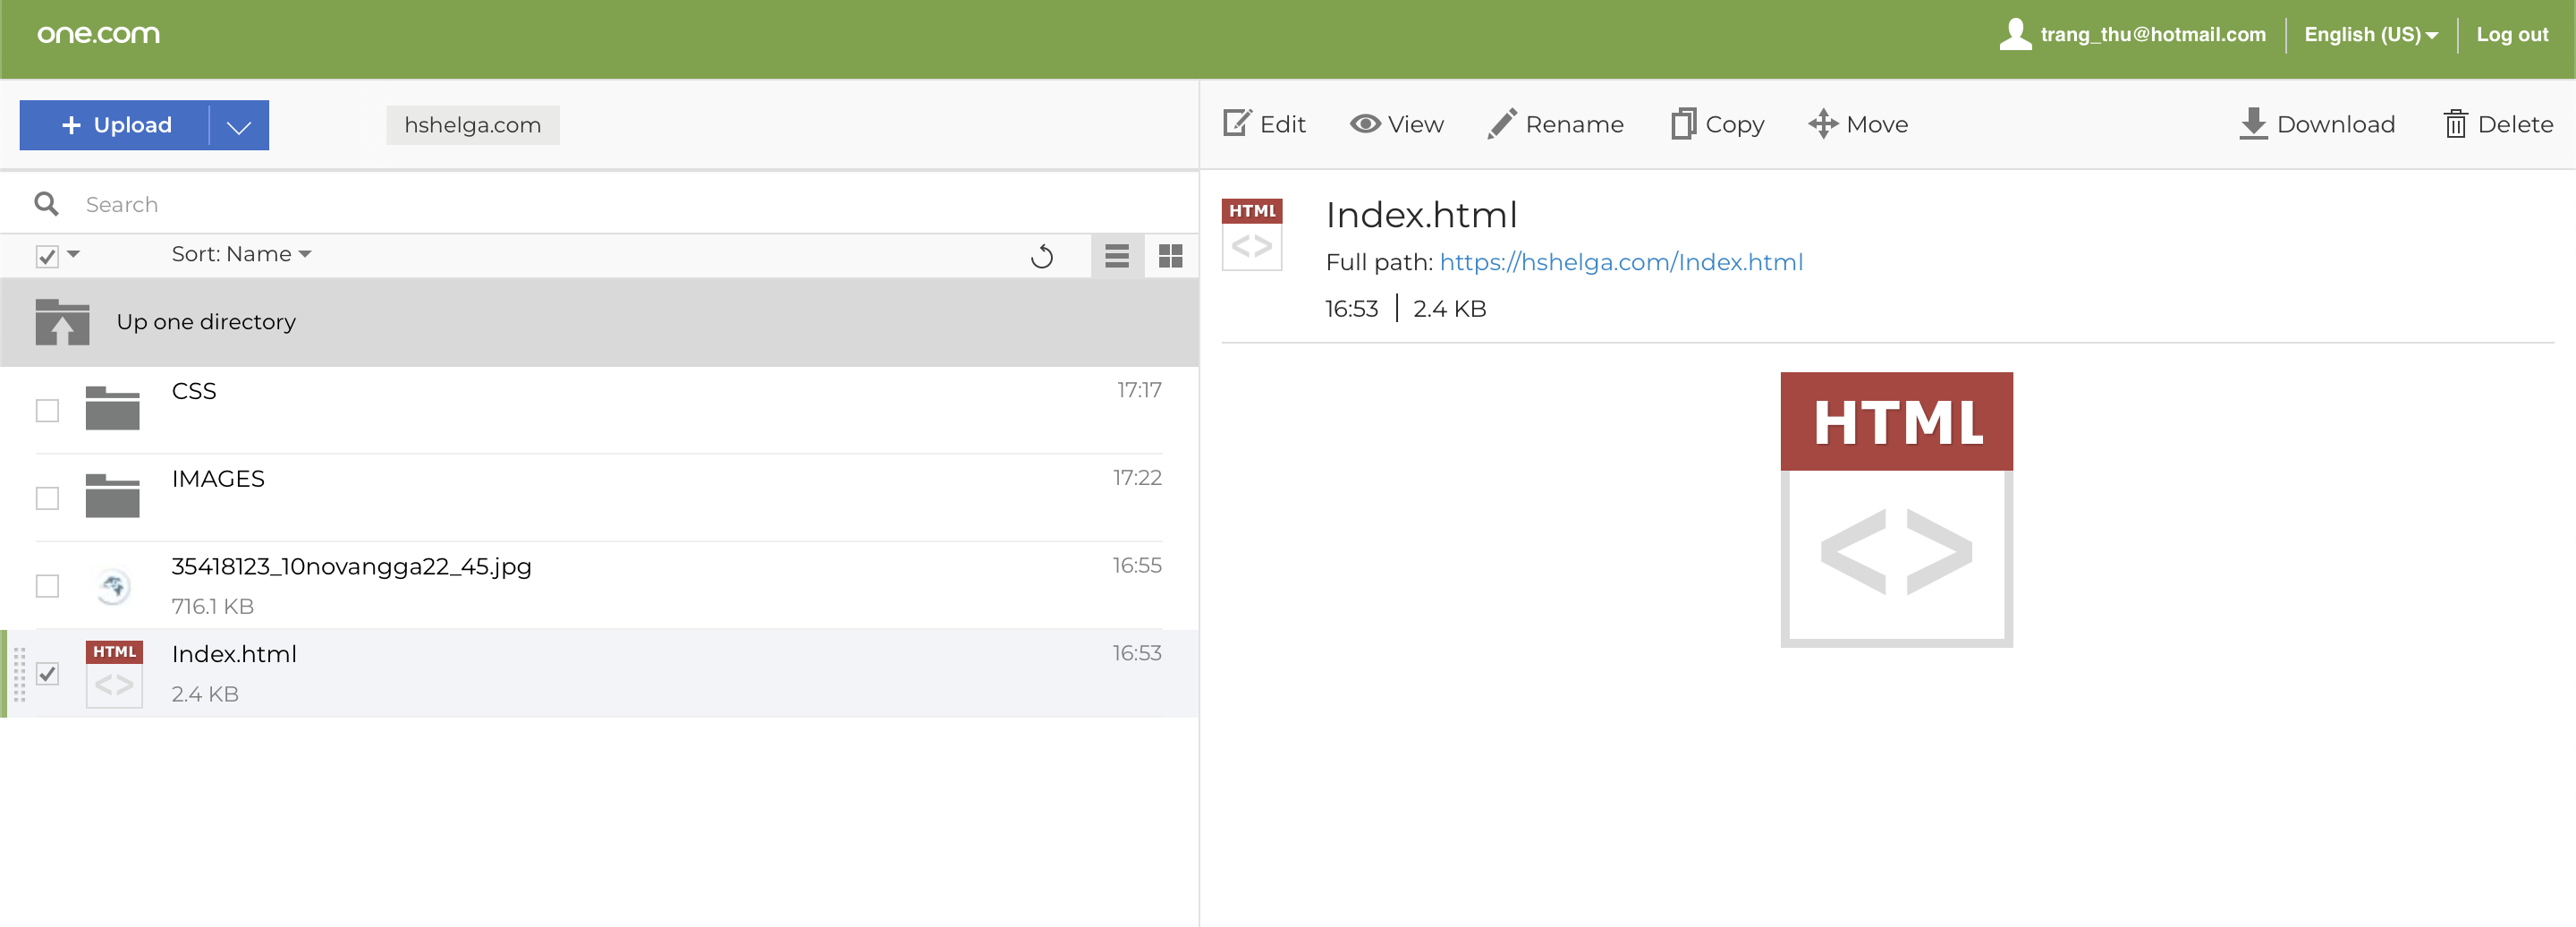
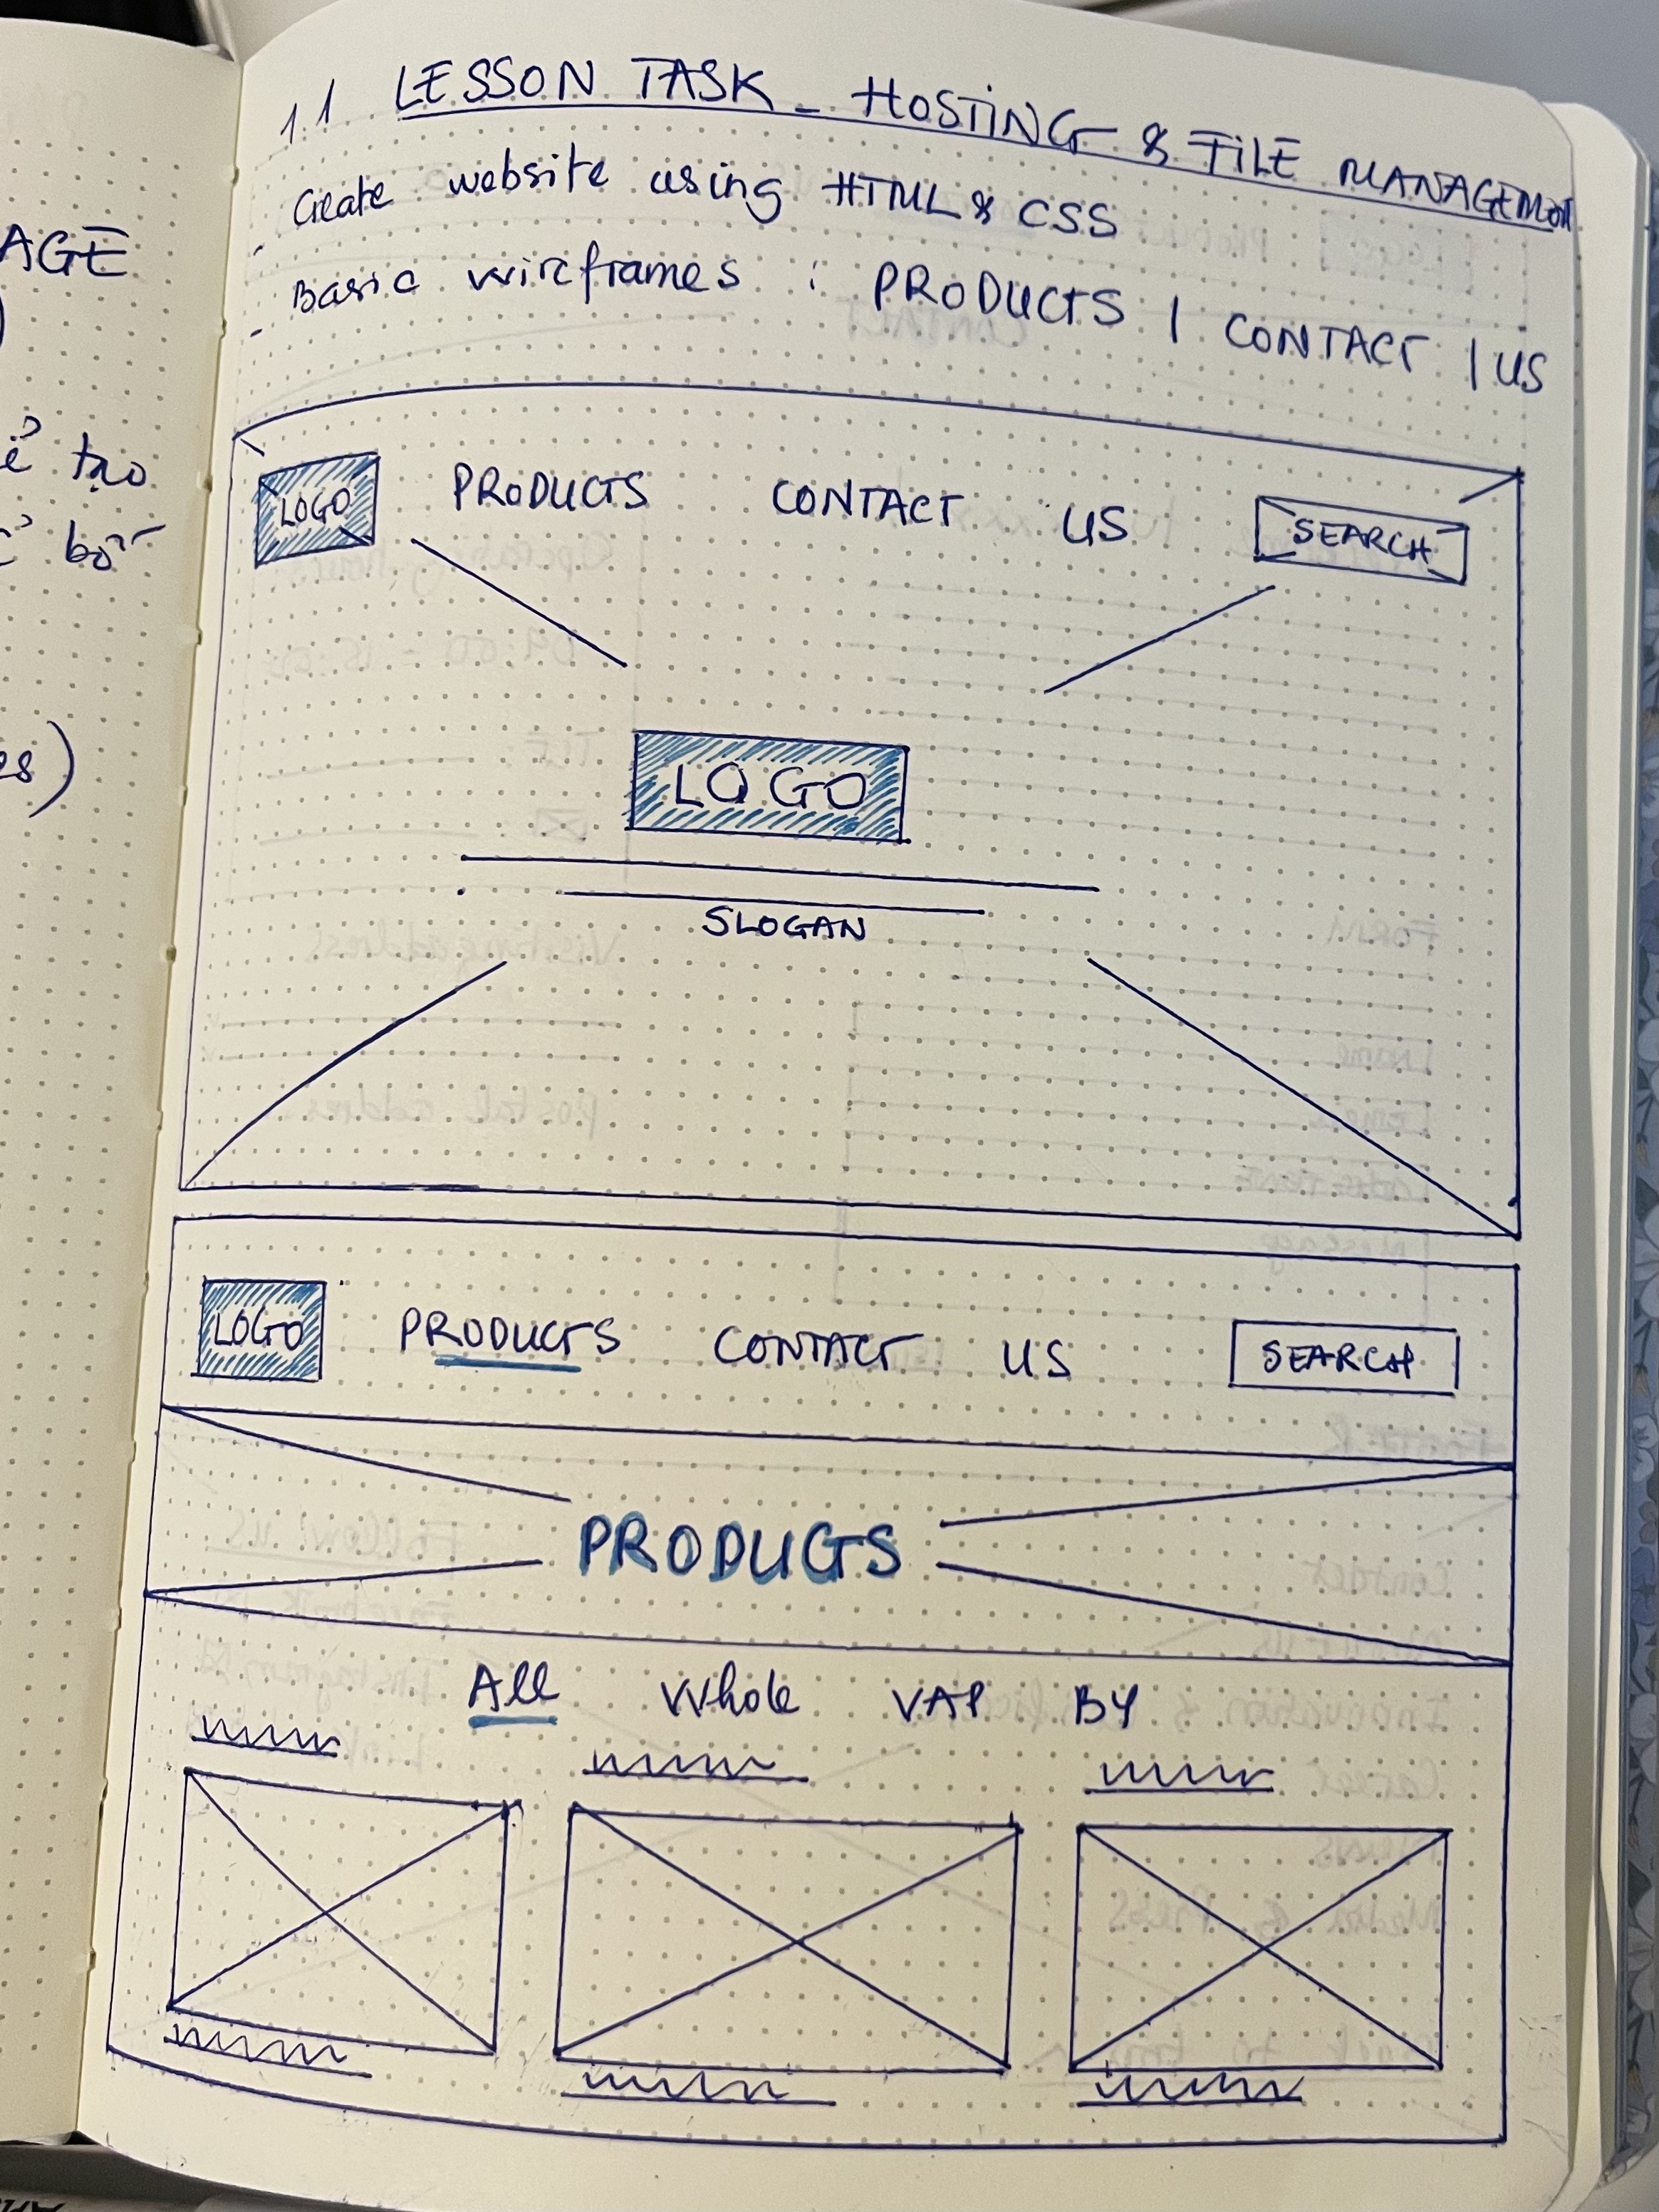
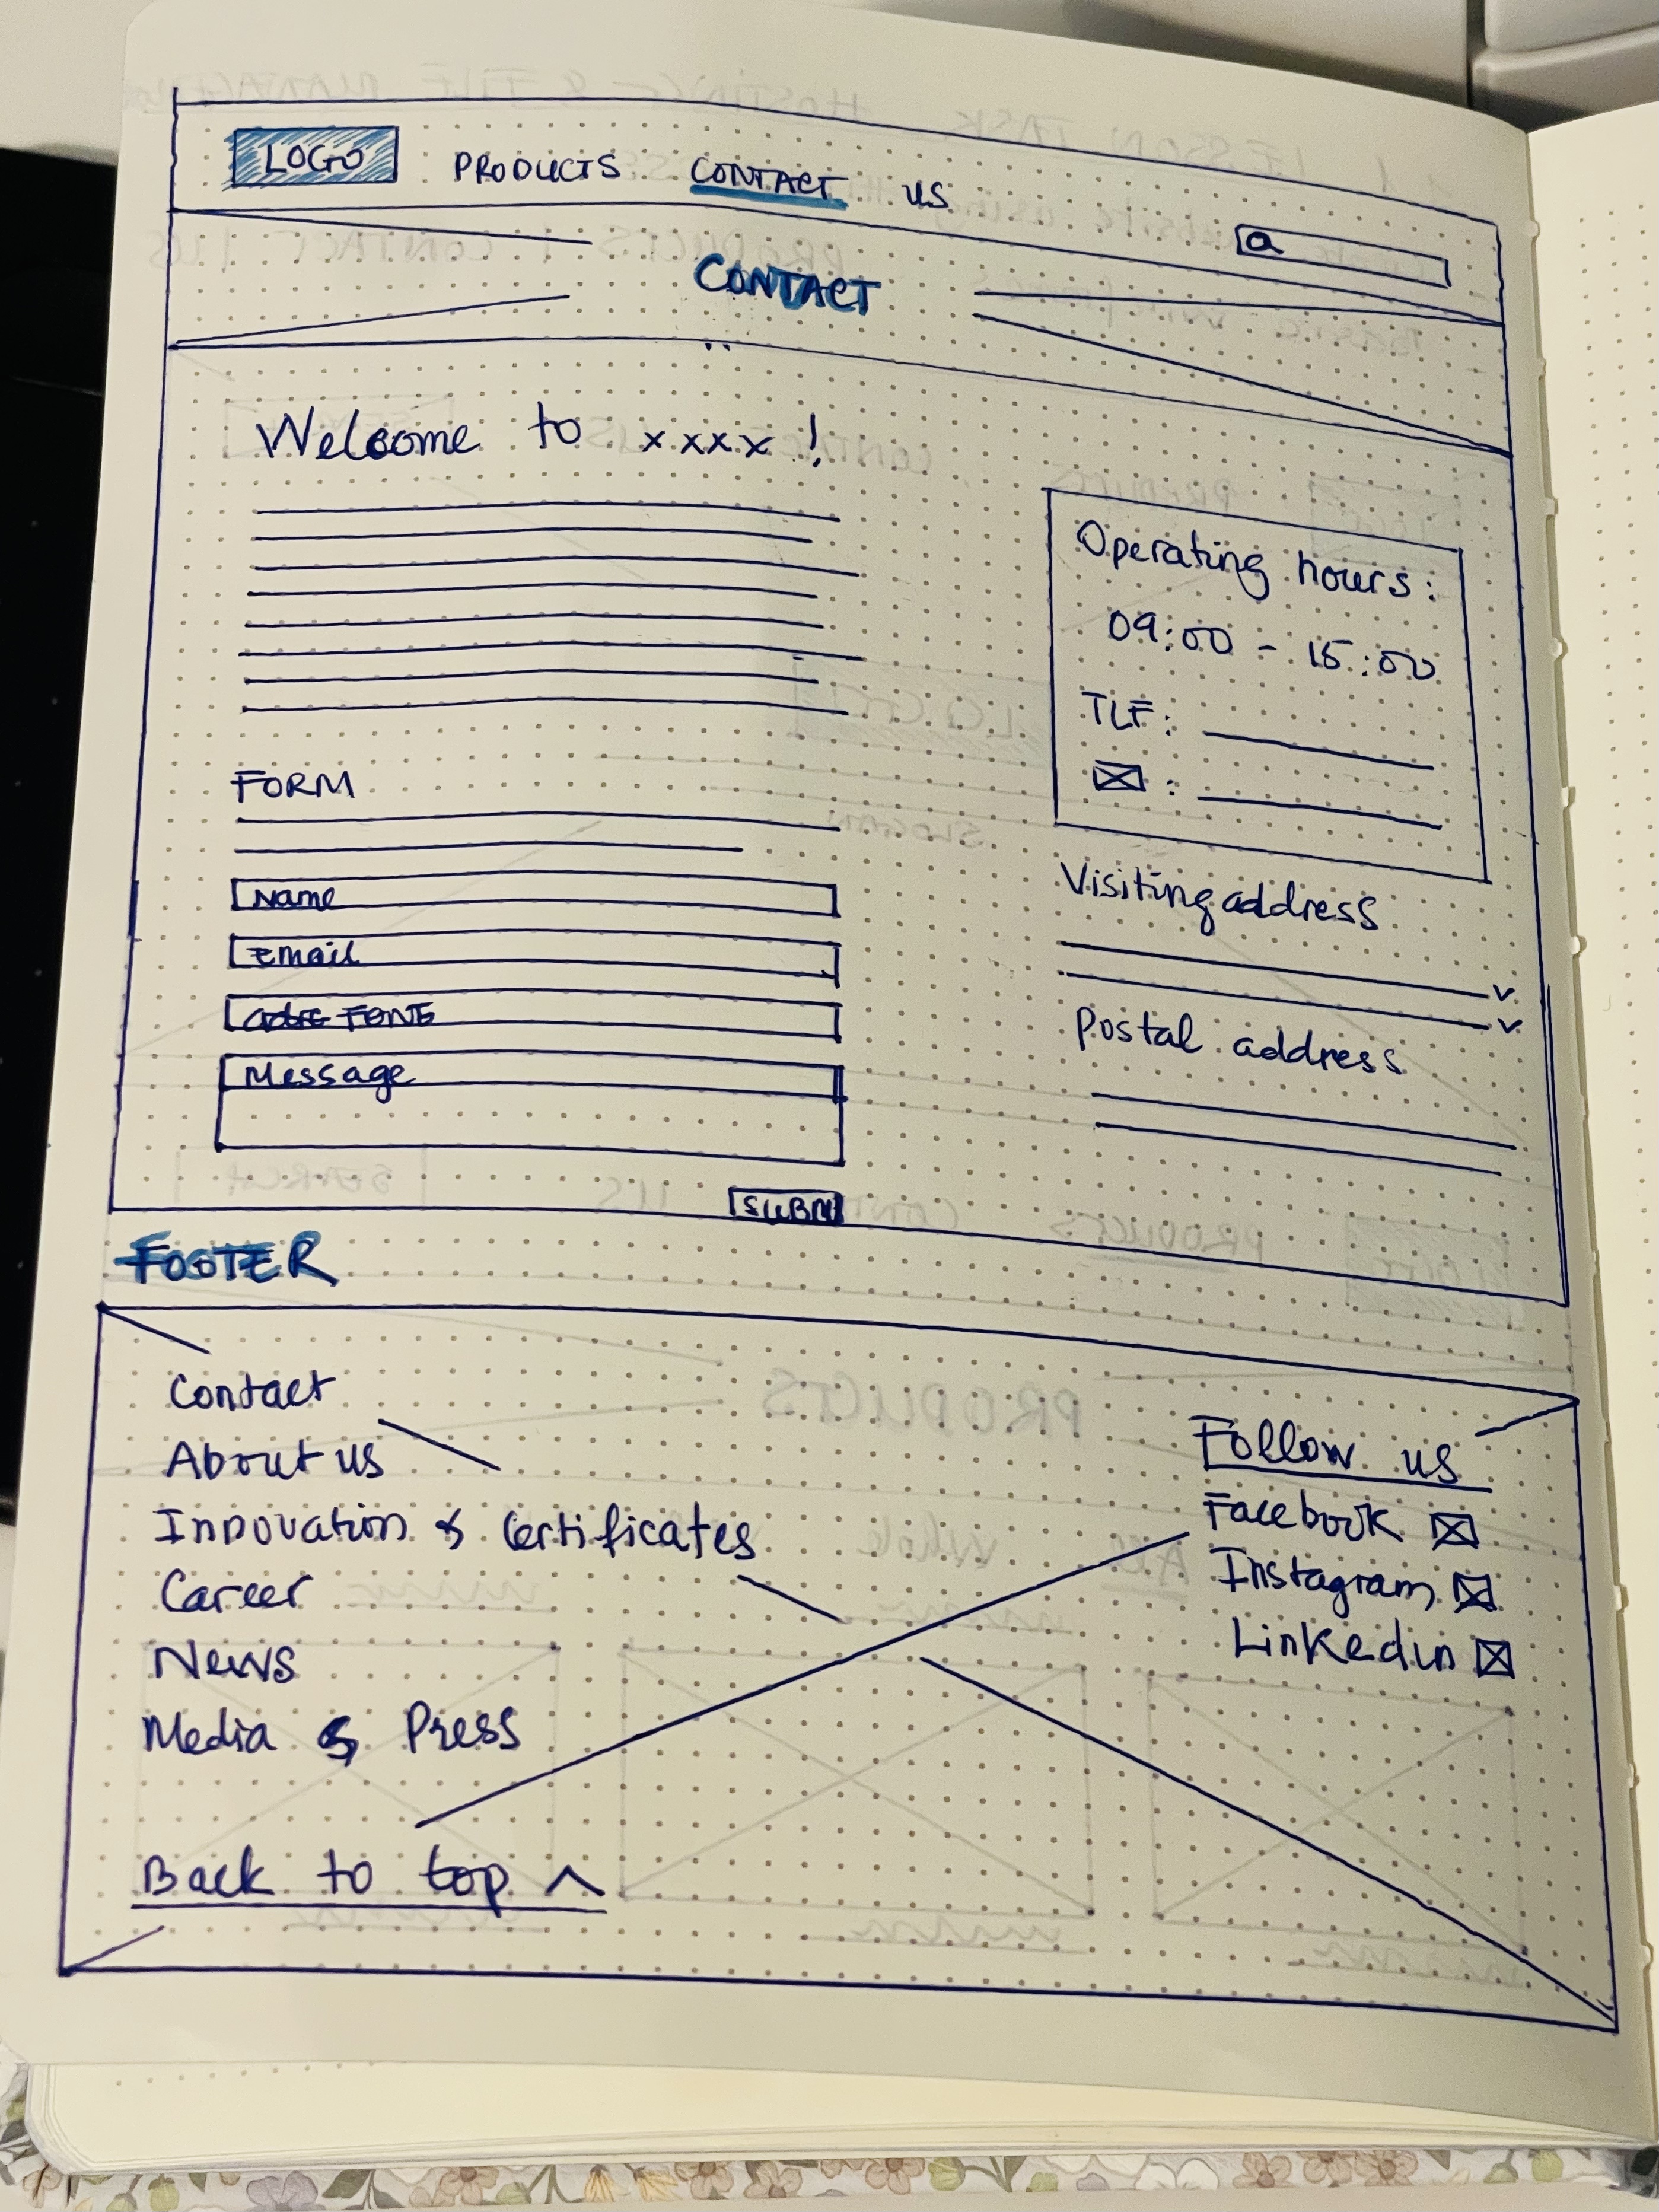
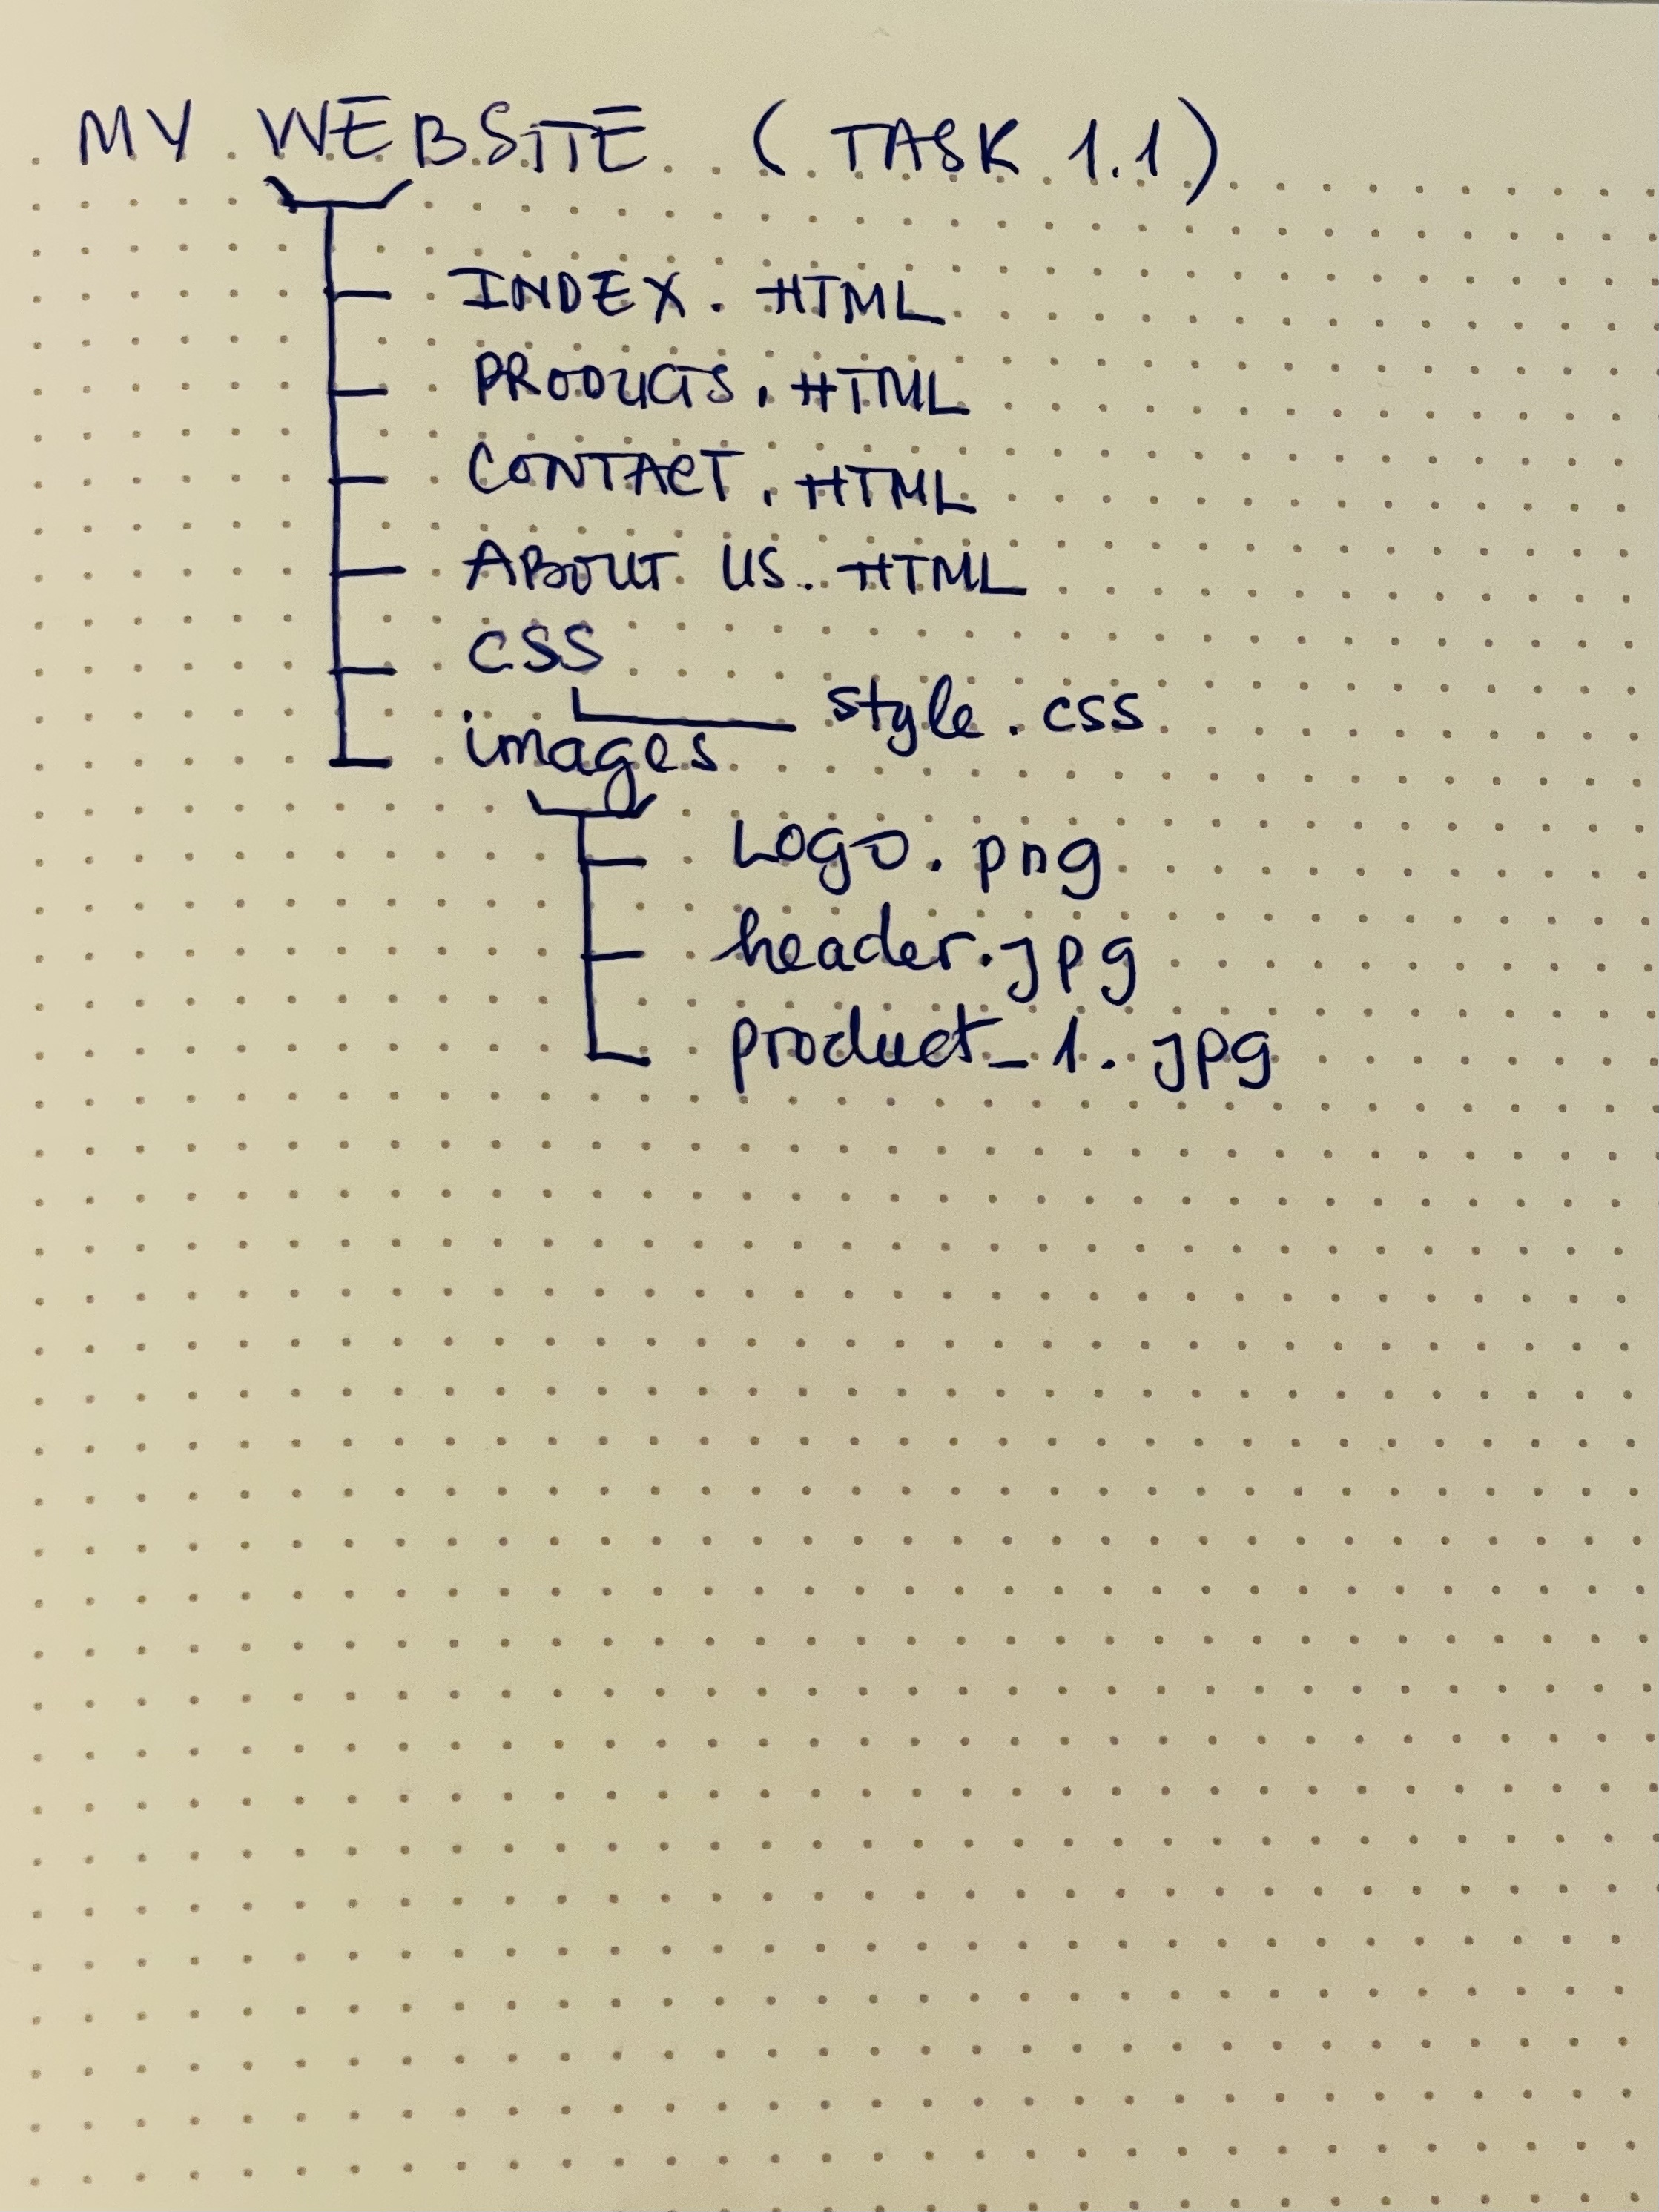
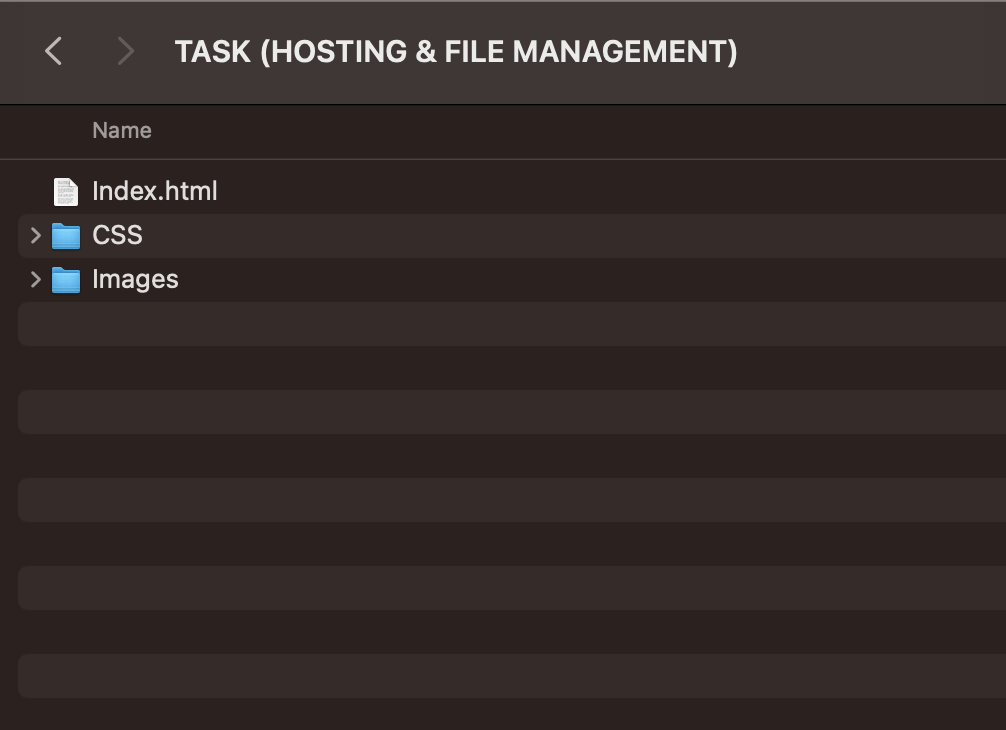
TASK 1.1 – Screenshot of the folder and, together with the sketch of the structure
TASK 1.2- HTML BASICS, screenshot of the HTML-coded document. Describe the function and meaning of each element
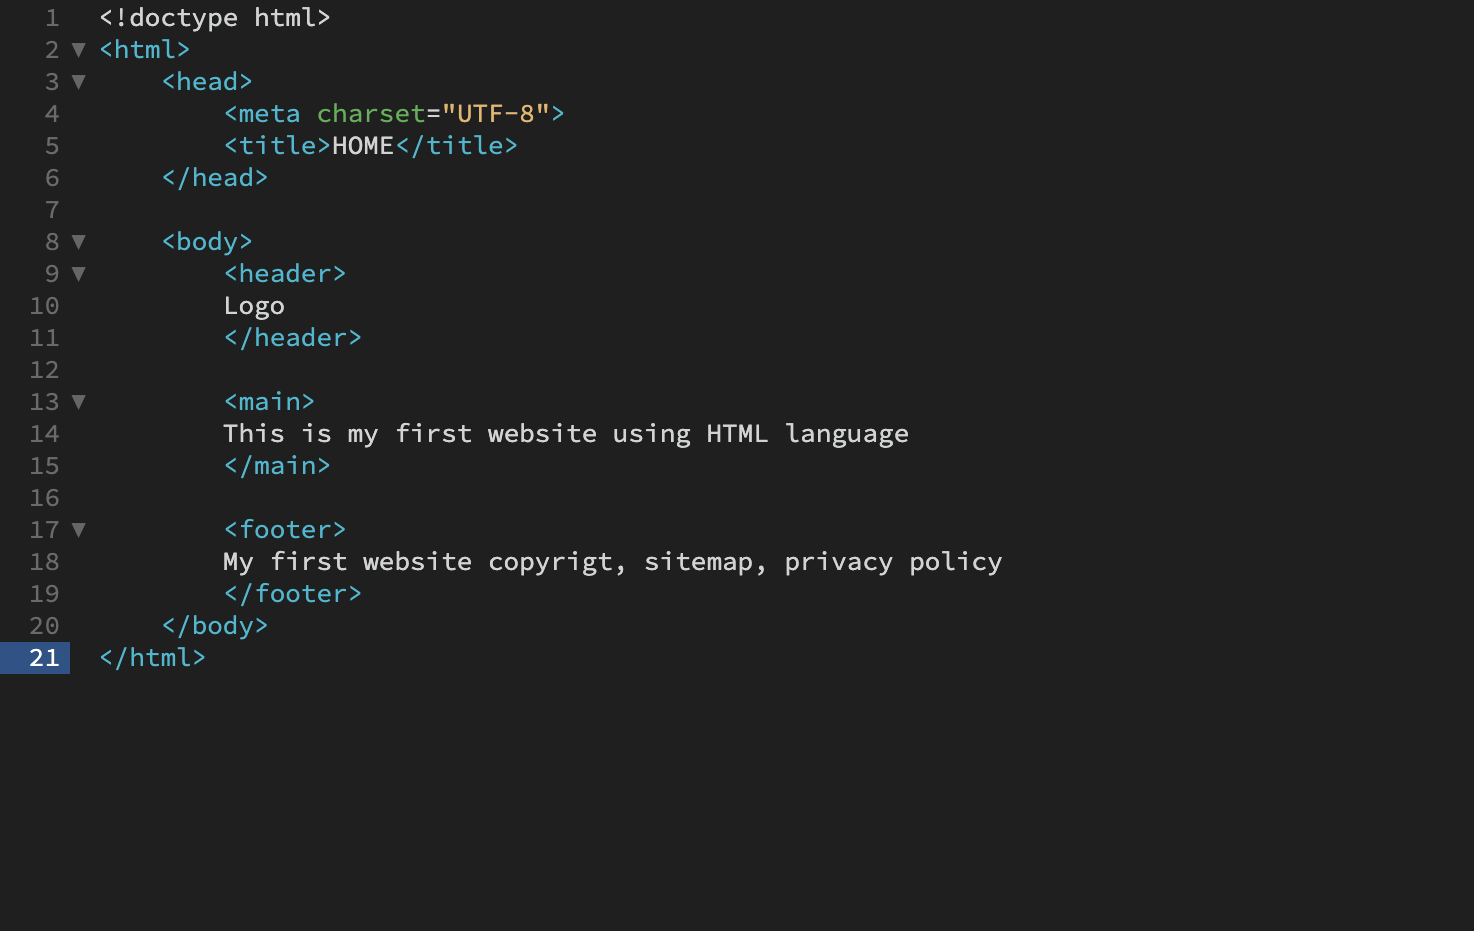
- <!DOCTYPE html> This is the first line of code required in every HTML or XHTML document. The DOCTYPE declaration is an instruction to the web browser about what version of HTML the page is written in.
- <html> This element is used as a parent for the whole document to make sure the browser knows what code is used to make up the content. For browsers and bots (computers) and developers
- <tiltle> This element is within the <head> element. It sets the title of the document. It displays on the browser tab and also gets displayed on search engines, so it’s vital to pick clear, unique titles for each page. For browsers and bots (computers) and developers.
- <head> In this element all the codes are back side, containing megadata. Just for browsers and bots (computers) and developers.
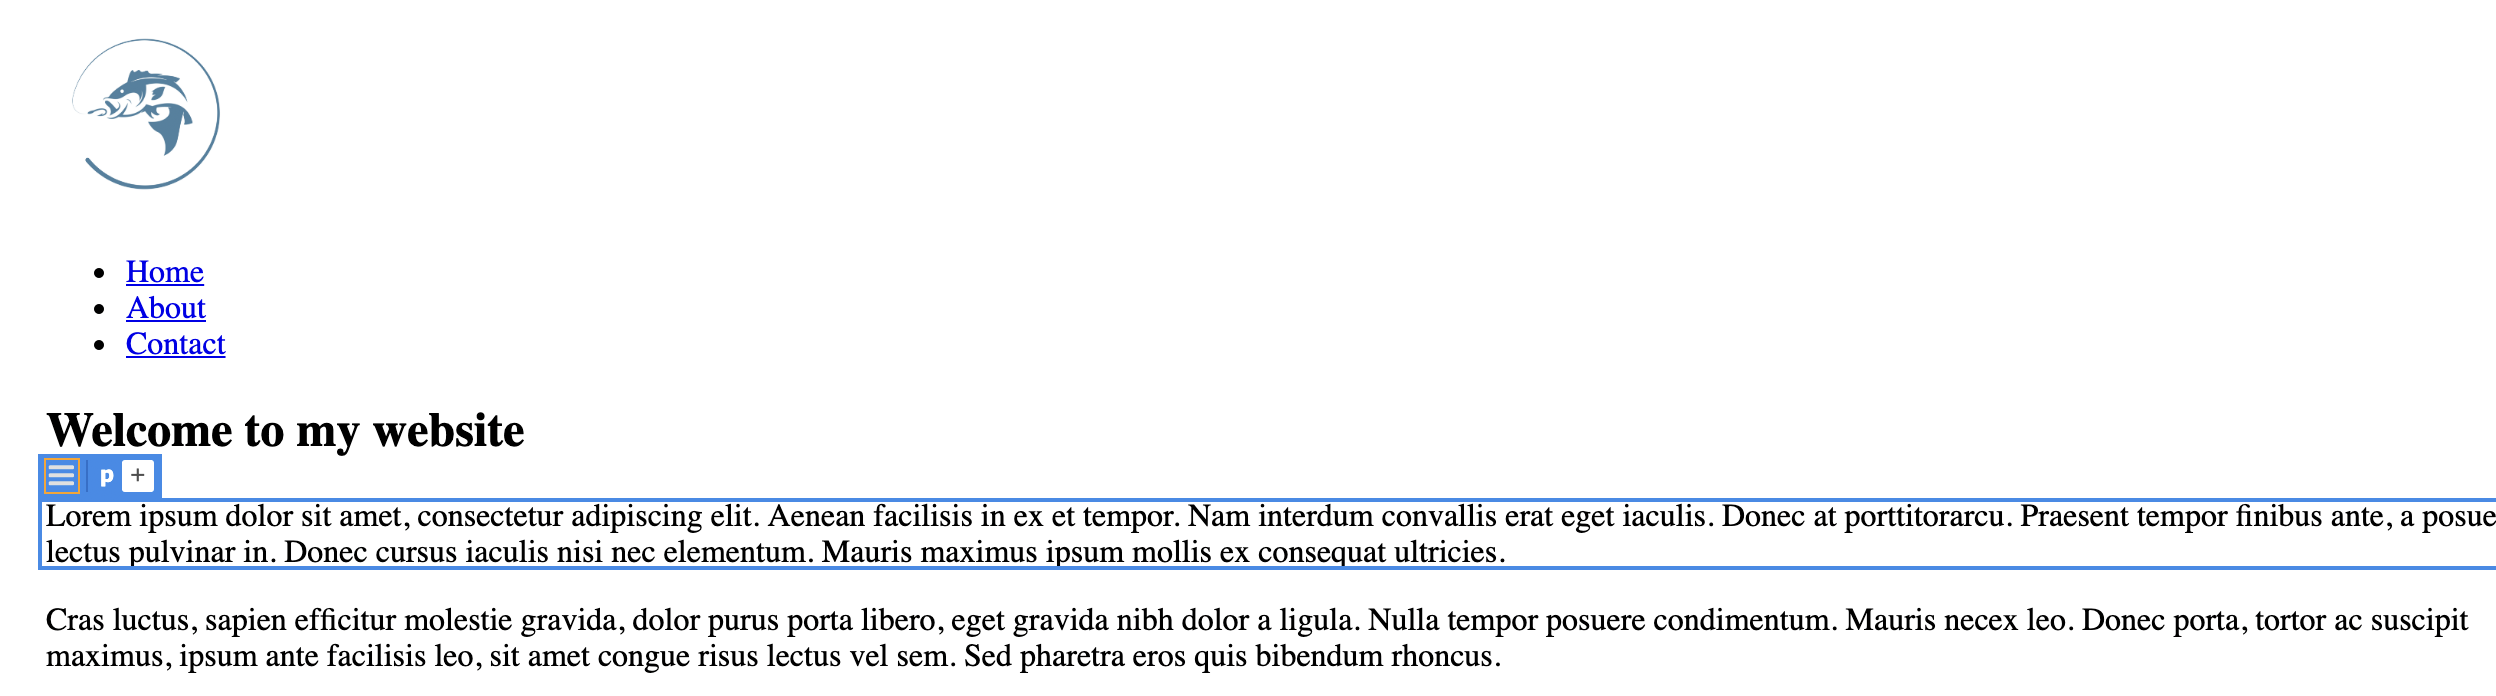
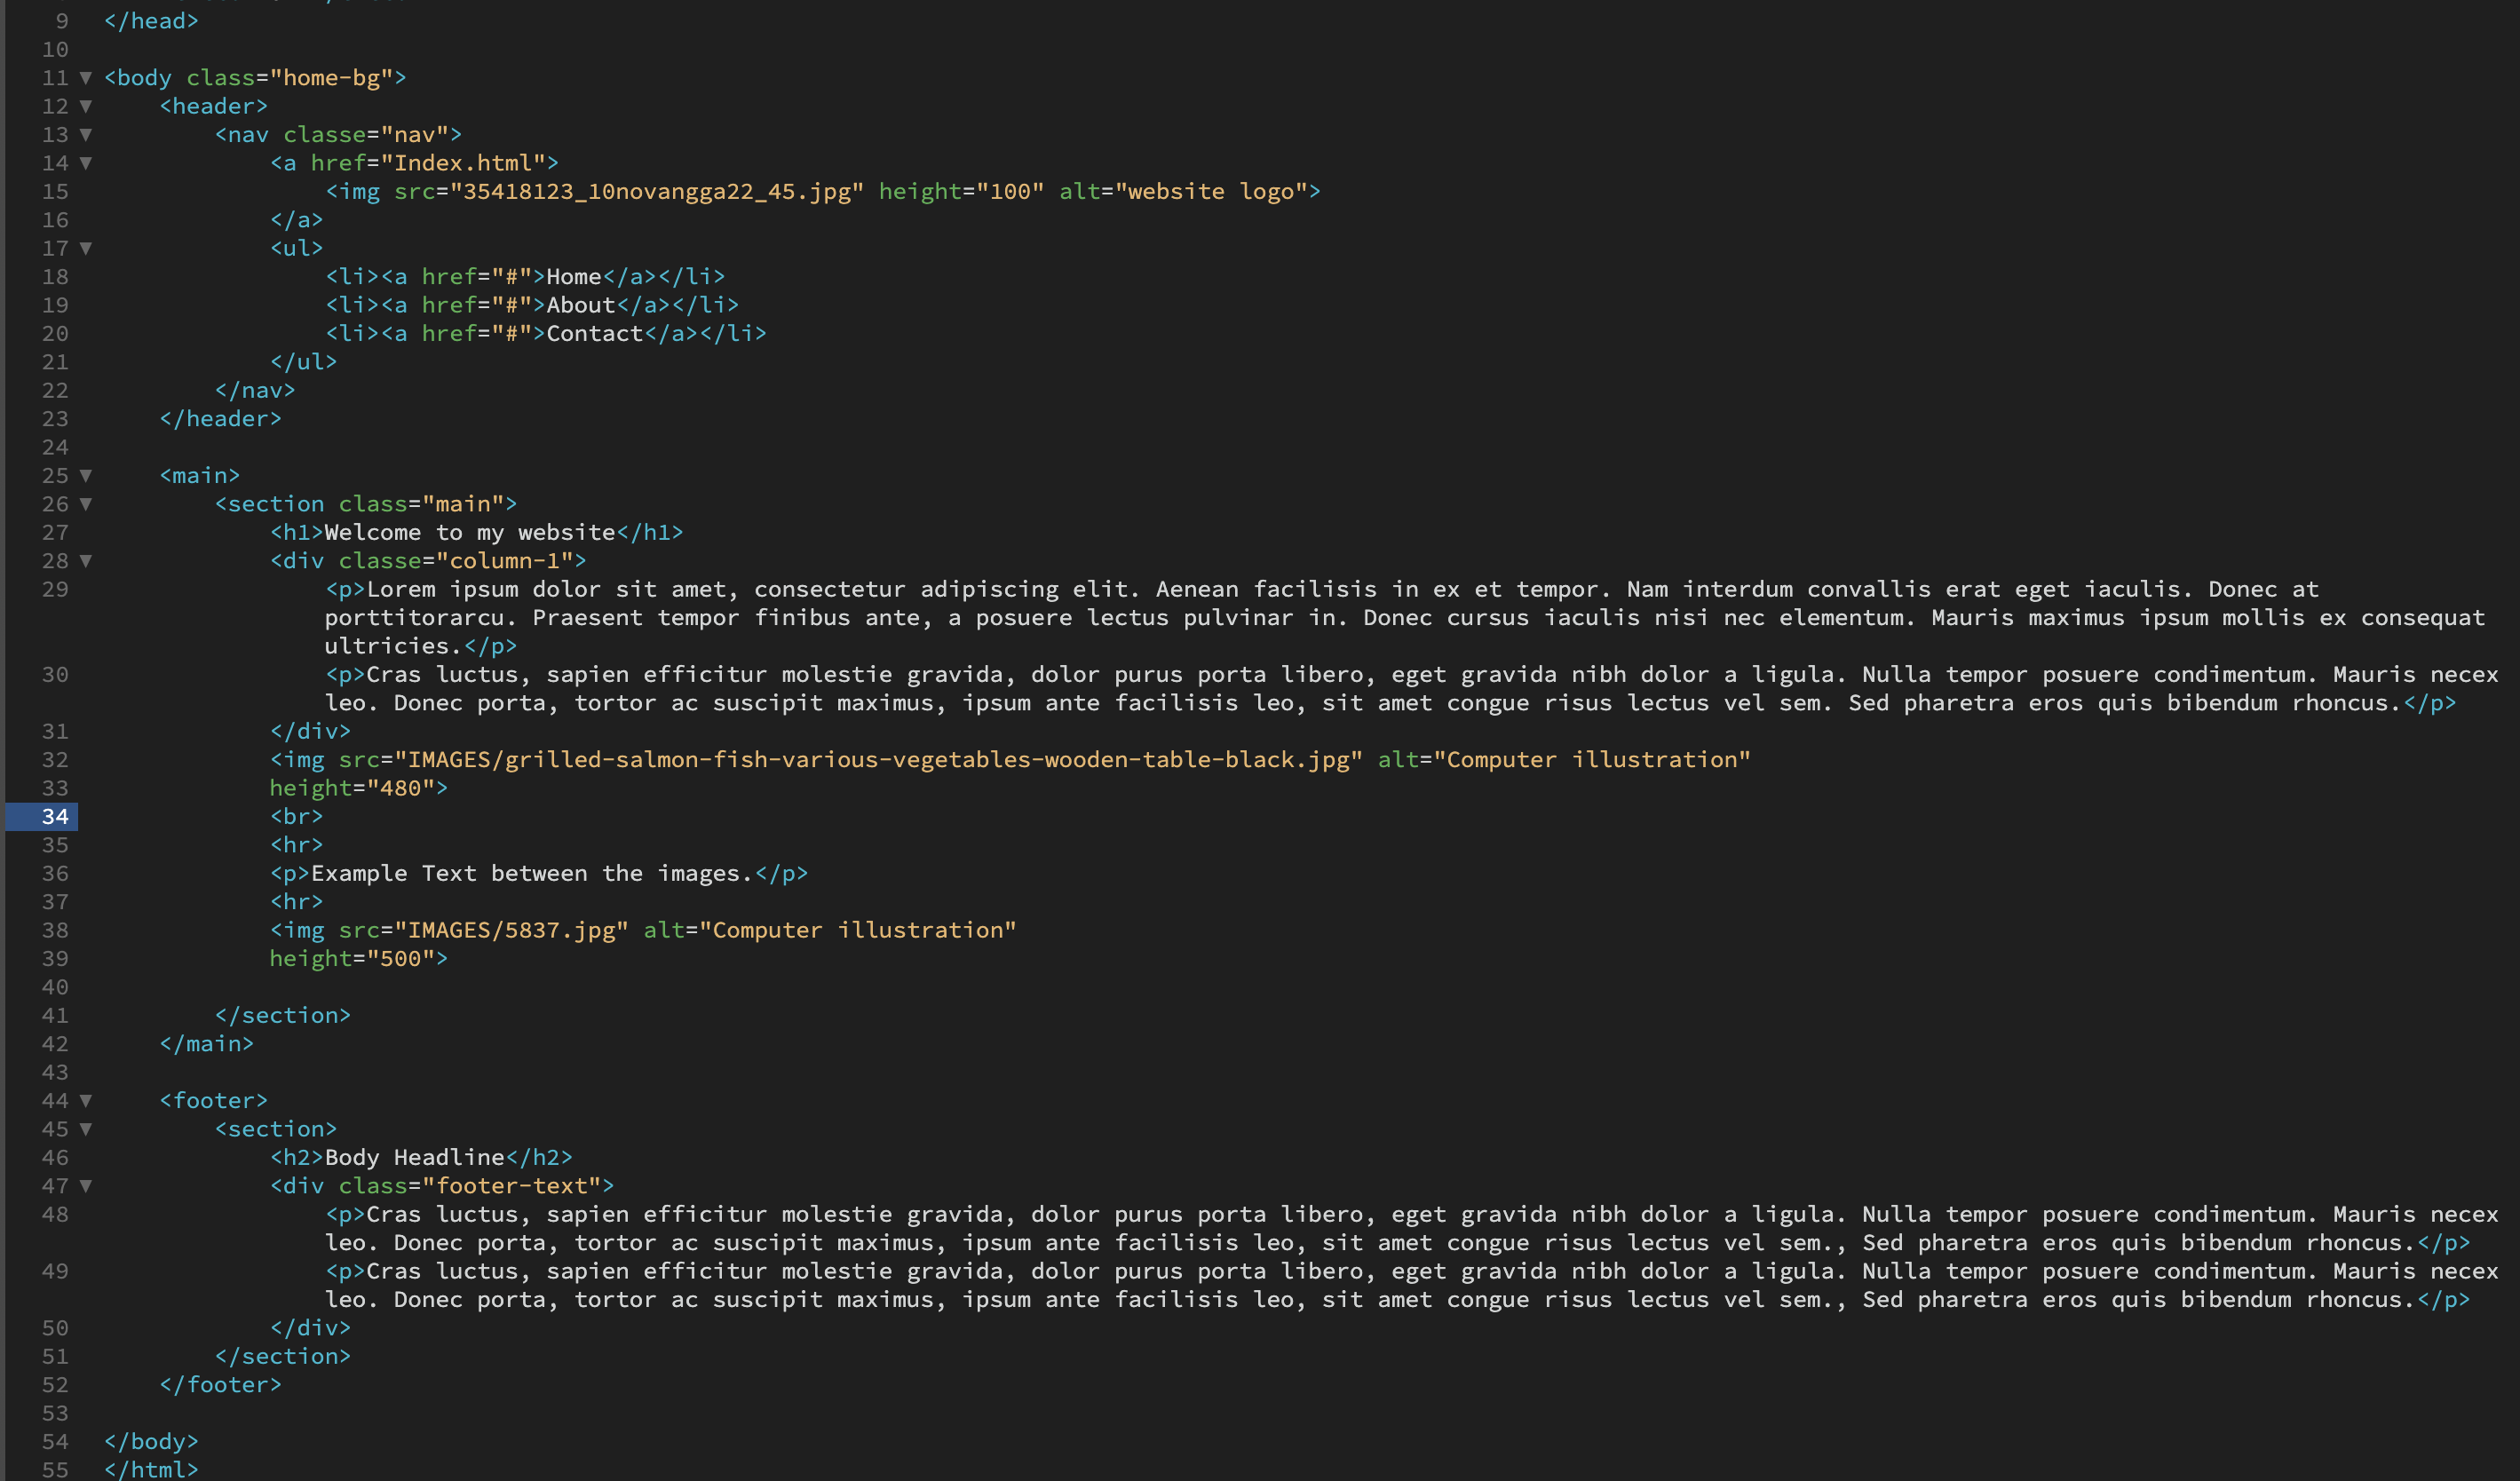
- <body> Visible to website visitors, contents , & <header>, <main> & <footer>.
- <header> This element is usually a strip that runs across the web page’s width. It often holds navigation elements or the element, logo, and a possible heading or header image.
- <main> This element – as its name implies – defines the main content of a given document. This is the biggest area on the page that holds the unique content for that page. This could include text, headlines, images, a video, etc. This part of the page will vary for each page of the website.
- <footer> This element may act as a footer for either a section or an entire HTML document. It may contain authorship, copyright information, possible contact information, and/or a sitemap. It’s usually a strip that runs across the page and visually indicates the end of the particular page. It’s good practice to keep the footer consistent across the different pages of a website. The footer is also sometimes used for SEO purposes by providing links for quick access to popular content.
- <nav> This element is specifically used to hold the primary navigation elements of an HTML document. These links to the website’s different pages should preferably remain consistent on all pages for a better user experience. The navigation bar can be nested inside the <header> element or just below the <header>.
- <section> This element defines a block of HTML code that may be viewed as a section of a document. This is deliberately vague, as a section may be defined in several ways. Sections can represent chapters of a document but can also refer to sliders, galleries, or any piece of content that will be grouped.
- <article> This element encloses a block of related content that makes sense on its own without the rest of the page. This may include blog posts, news articles, editorials, etc. Like the section tag, the article element is somewhat vaguely defined, as it may be employed in many ways. But the rule of thumb is it’s a piece of unique content that can stand independently.
- <aside> This element is the equivalent of a sidebar in a magazine or newspaper. It contains information related to the element it’s placed in, for example, glossary entries, author biography, related links, etc.
- <div> Another way to structure content is by using divs. This element is not semantic and is very general. It does not affect the content or layout and is used to group HTML elements. It can be styled with CSS when you add an ID or class attribute to it (more on that when we look at CSS).
TASK 1.3- Semantic HTML
The following elements should now be added to the HTML document:
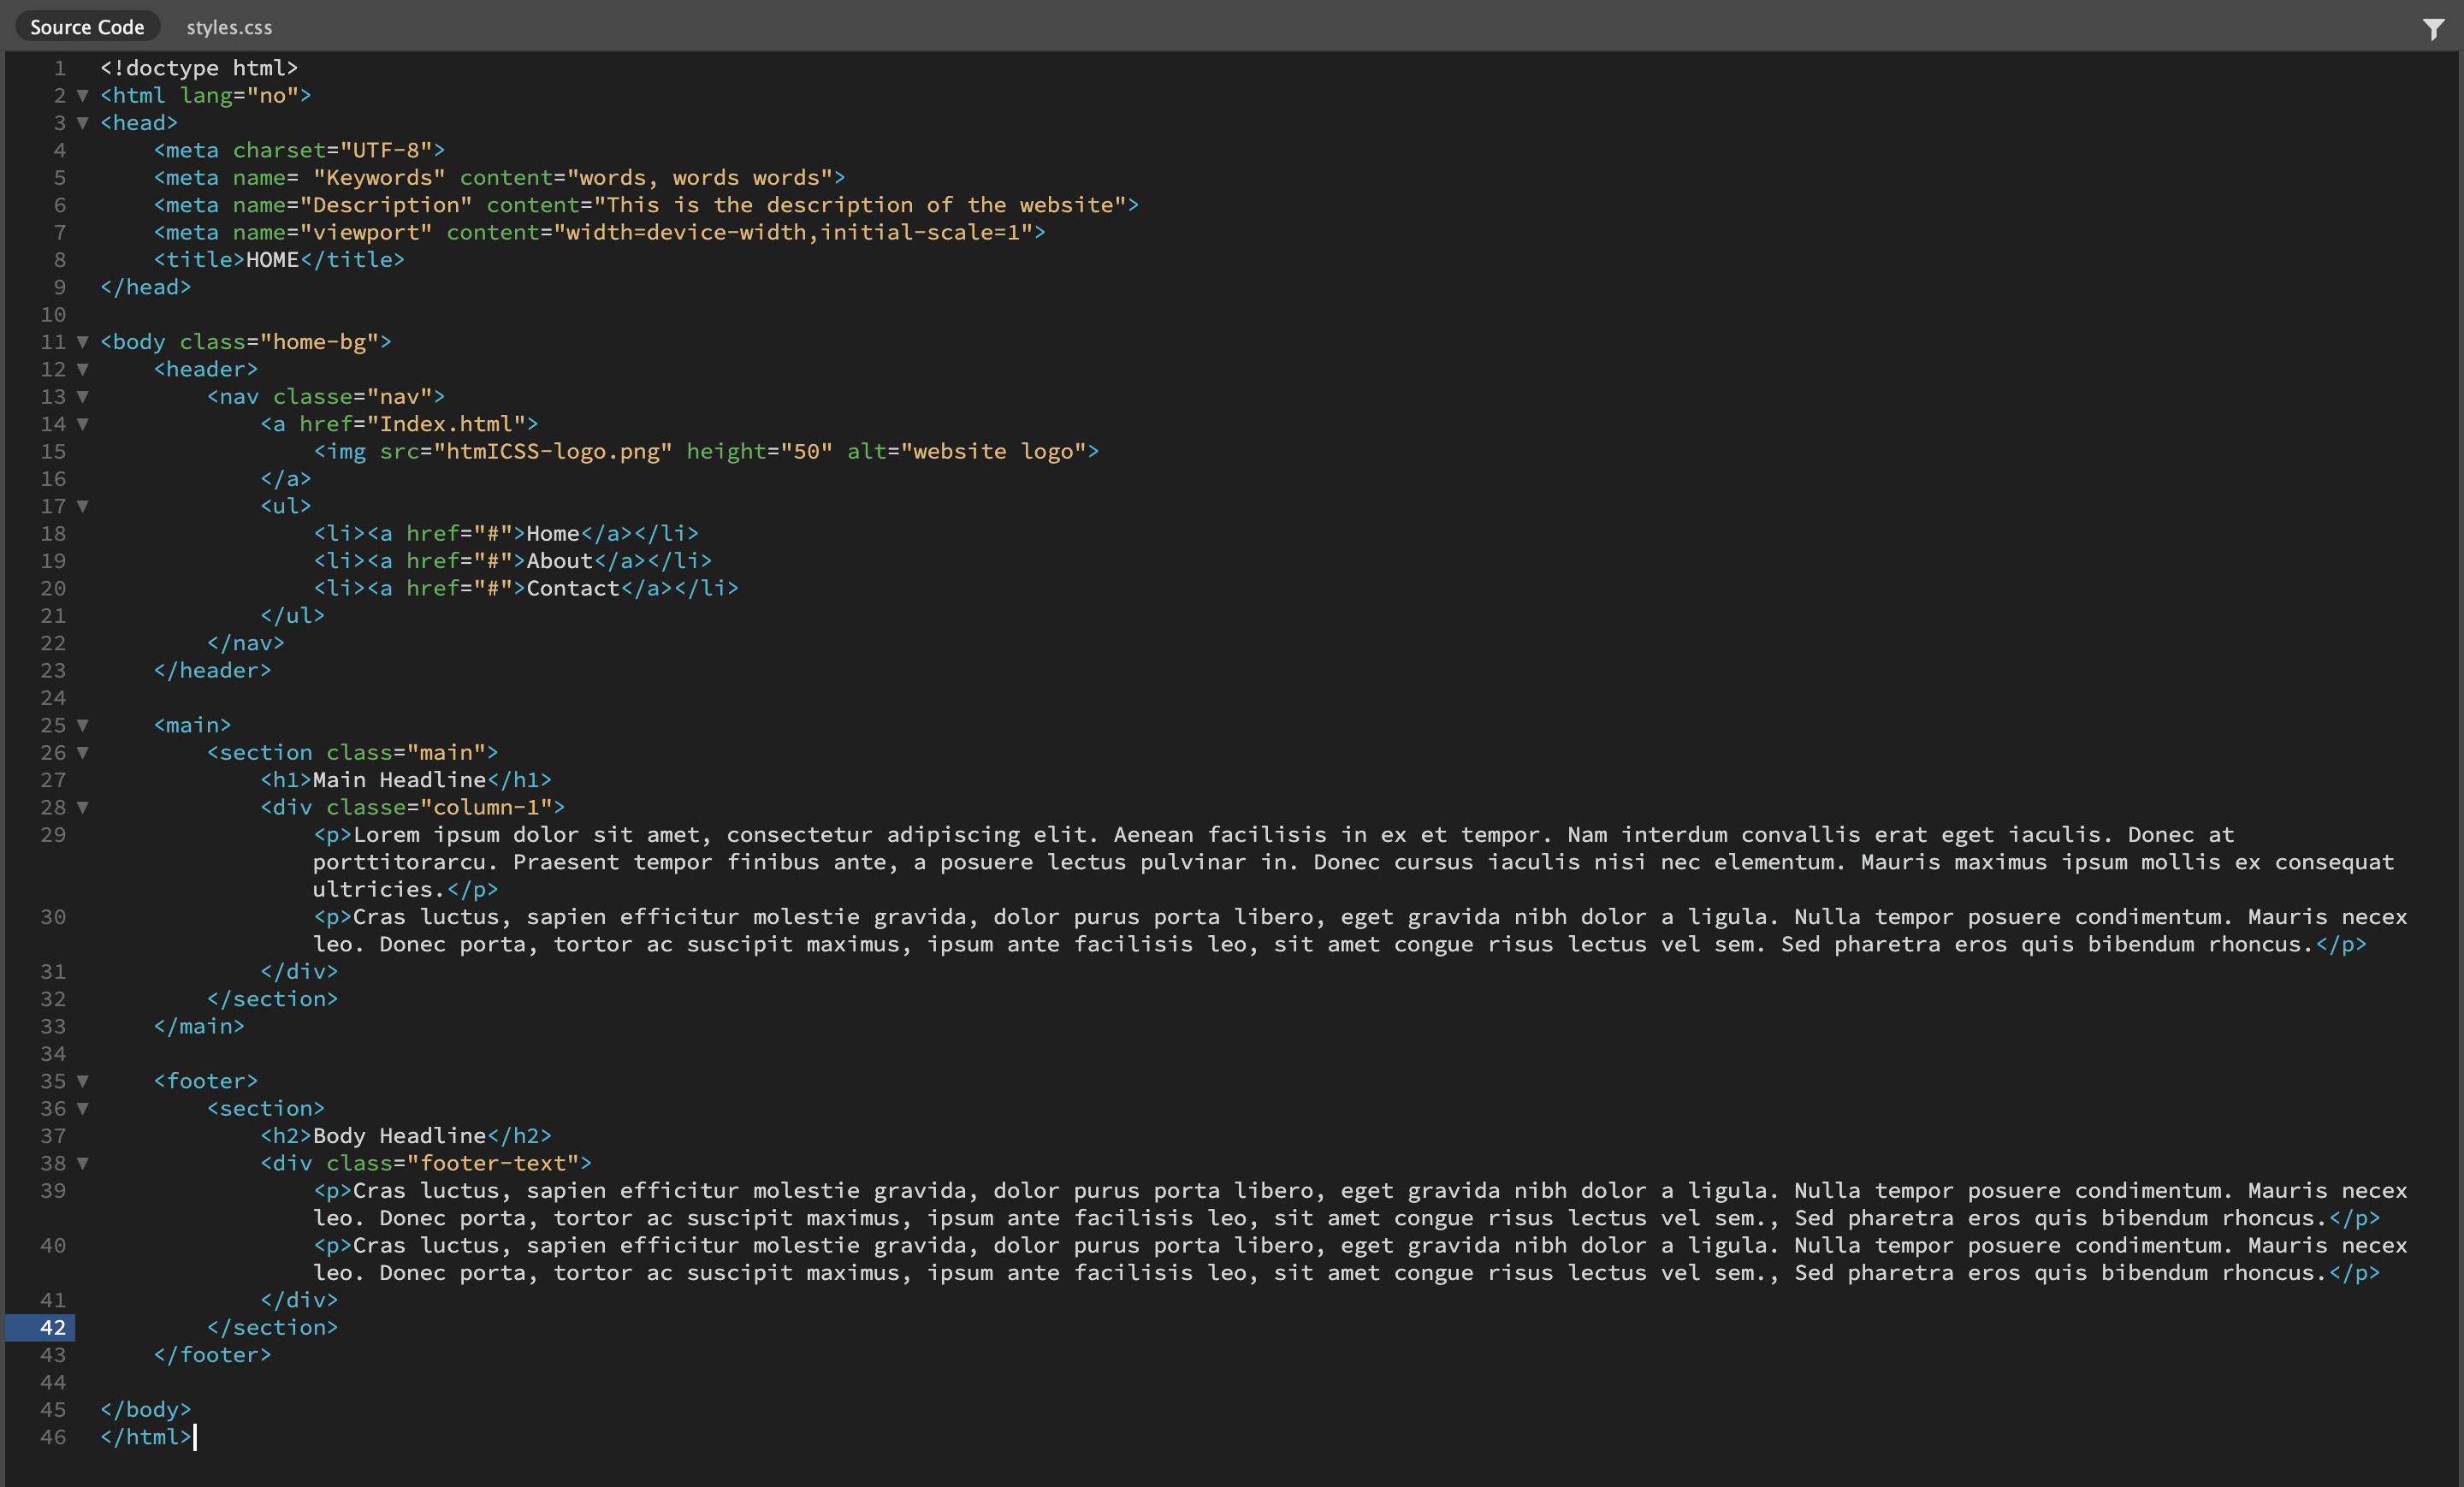
- <meta> element with some metadata – charset, description, keywords, author, viewport – note: must sit within the <head> element.
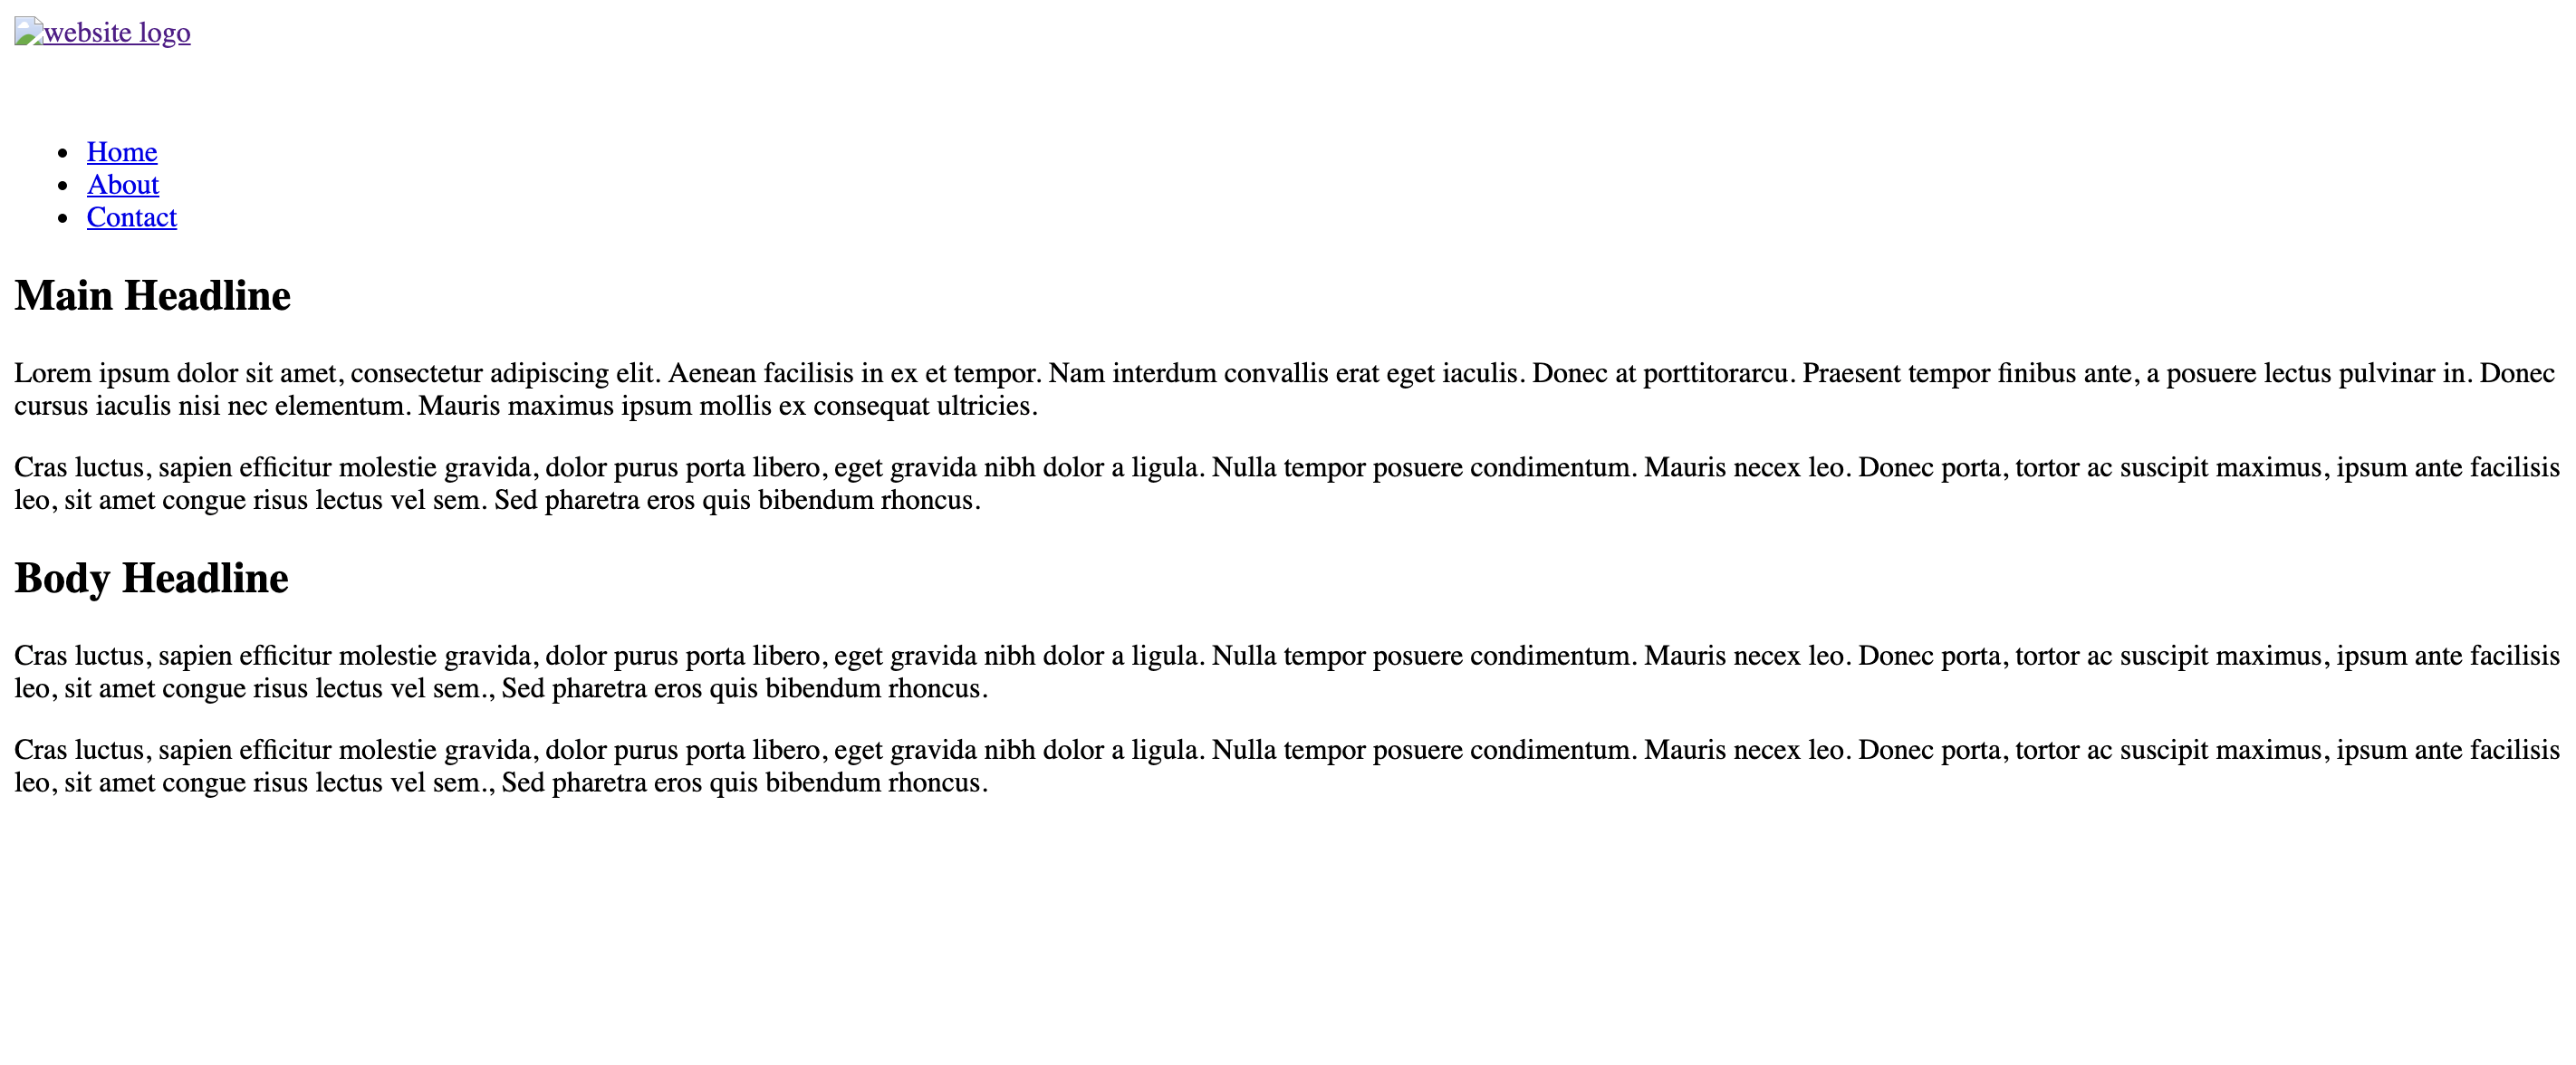
- Create a <ul> (unordered list) with <li> elements that will later form the navigation menu.
- Create at least two sections in the content using either <section>, <article> or <aside> elements that will hold the main content.
- Create at least one <h1> element and one <h2> element. Note how the <h1> and <h2> elements render as different sizes and as bold text.
- Create at least four <p> elements.
TASK 1.4- HTML Links and Images
A. Question 1
- Create the other HTML pages that you have planned for the web page. (This should include all the pages that are on your <ul>). Take note of where you are saving these files in your file structure.
- Using the href=”” attribute and relative file paths, create links to each of the pages from the <ul> in the index.html document.
- Populate each new HTML file with the same <ul> for navigation and at least a <h1> header to state the page’s title.

B. Question 2
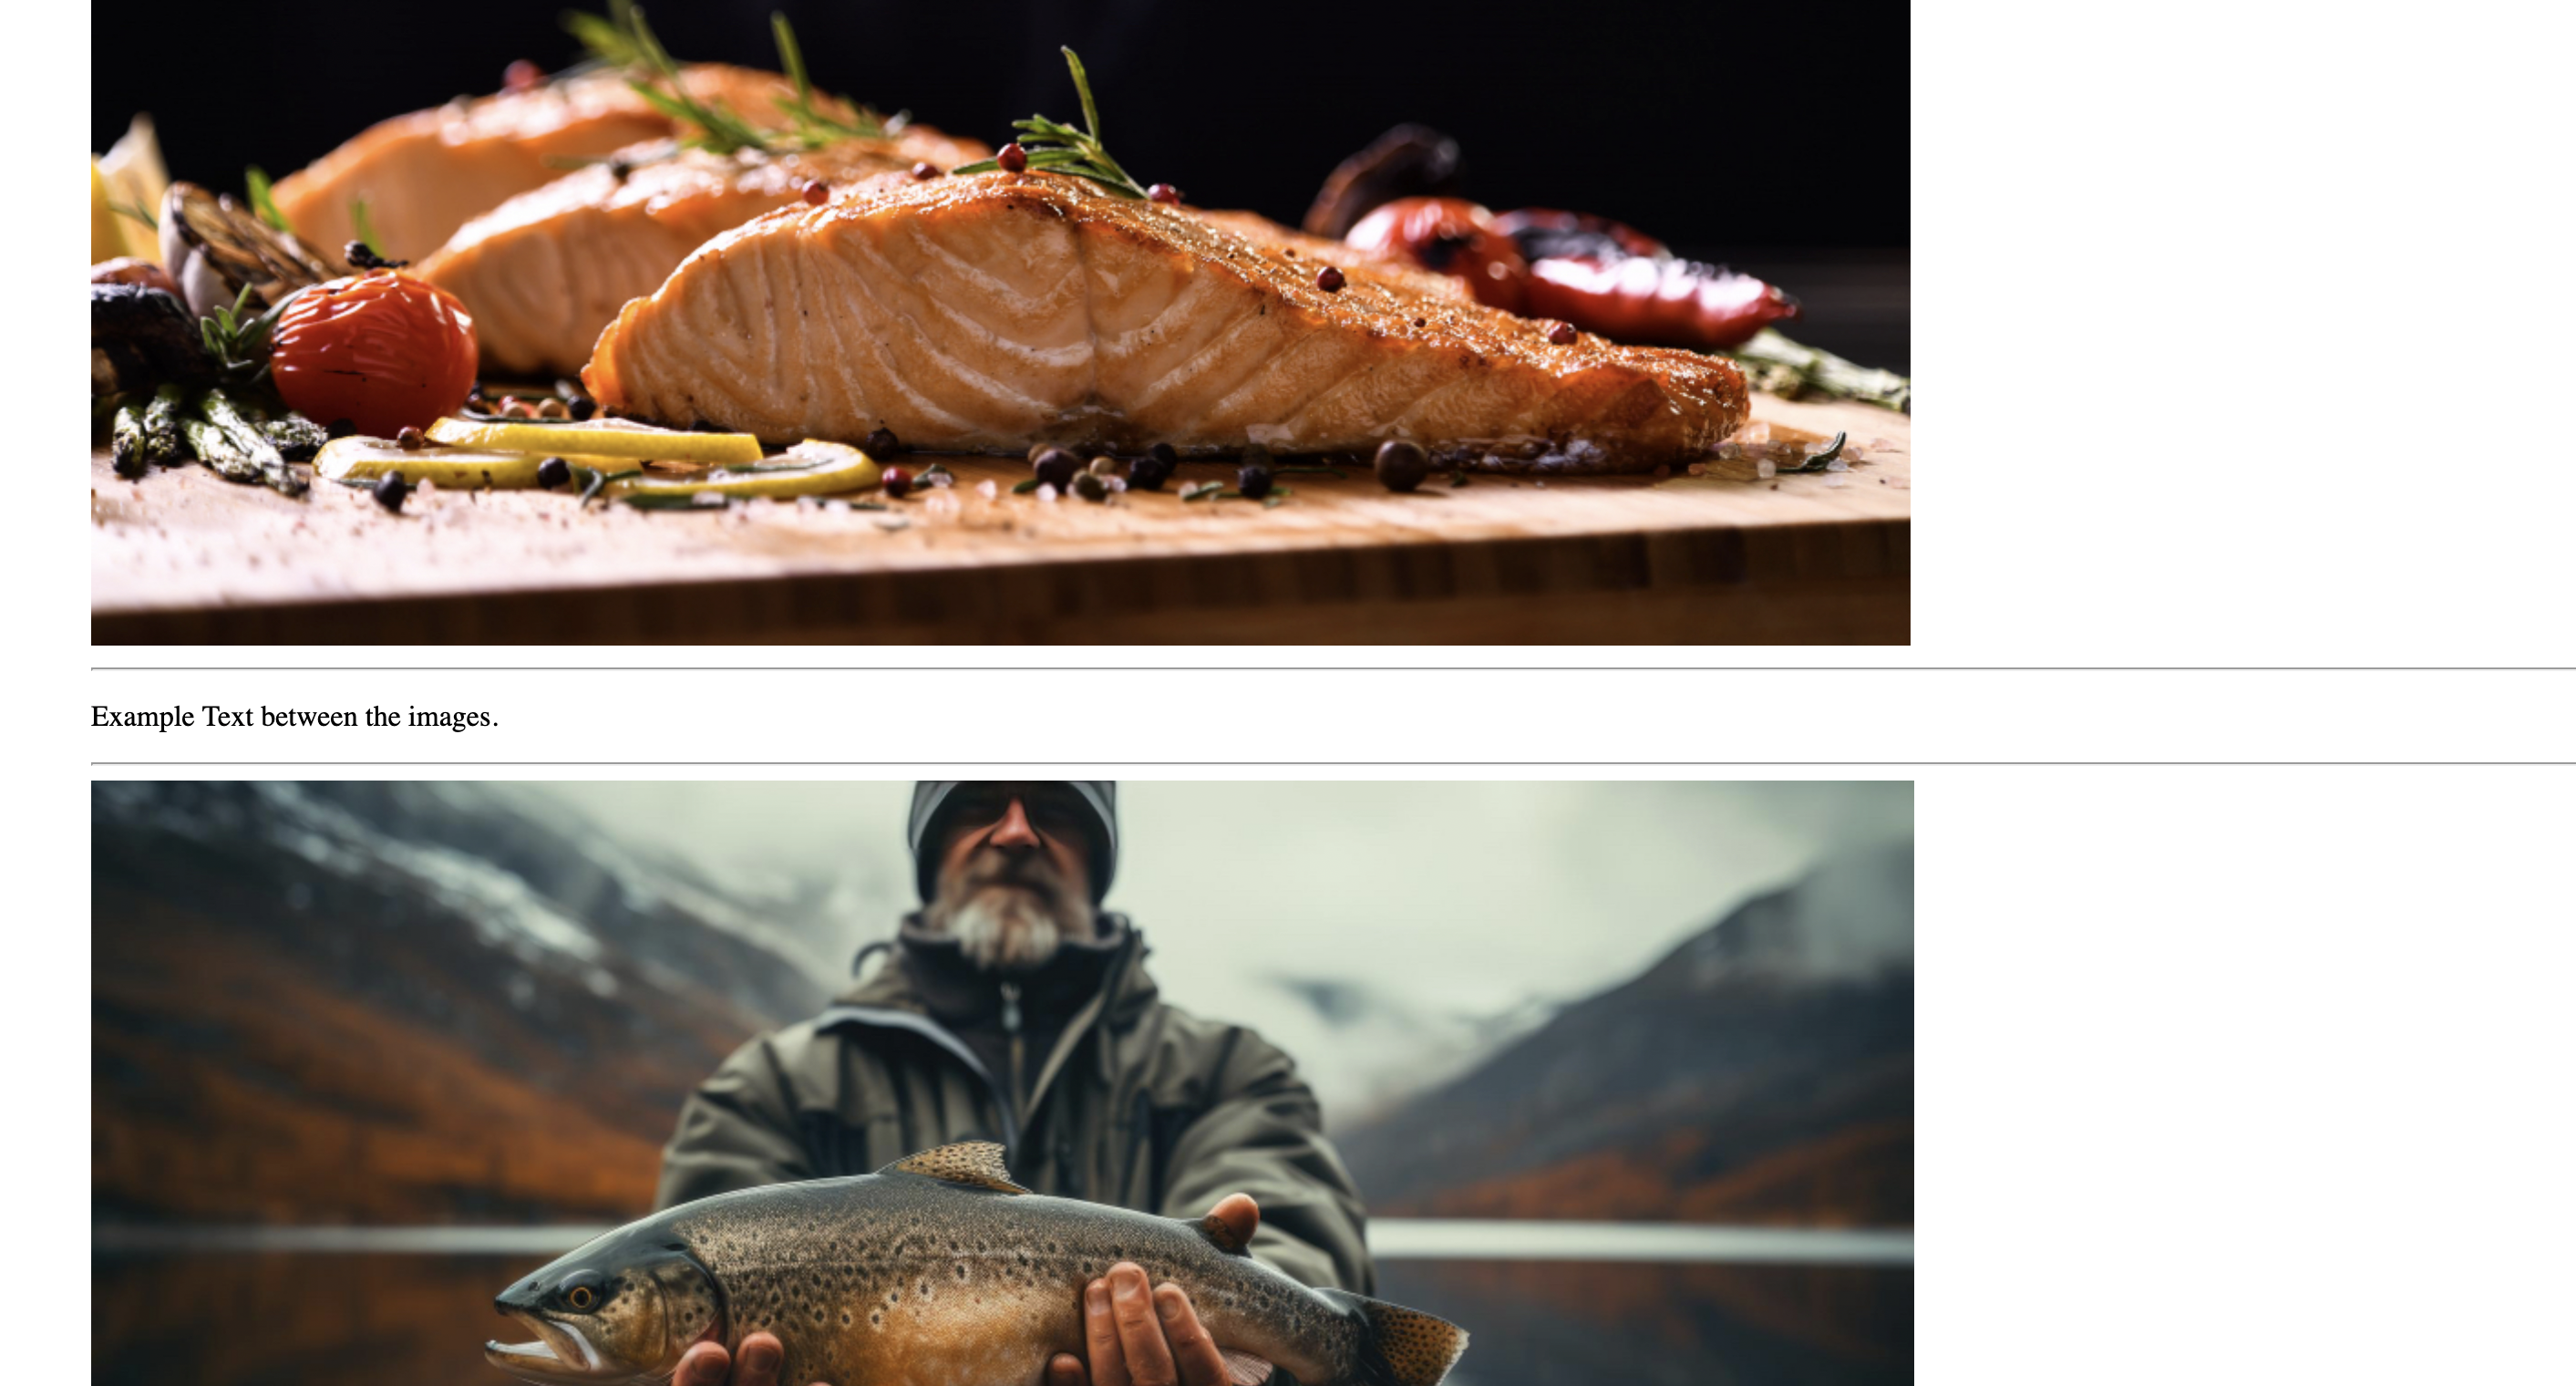
- In your index.html document, add one image to one of the page <body> sections using a relative file path. Note that you need to take special care about where you put the image in the folder structure and how you link the ‘href’. Add text for the alt attribute. This should describe the image in some way in case the image is not displayed.
- You can experiment by adding a width or height attribute to make the image fit inside the browser display.
- Add another image. Observe how the images are placed on the HTML page. Add a <br> element between the images to see how the layout changes. Add an <hr> element to insert a line break between the images. Finally, add a <p> element between the images.
C. Question 3
- Select the root folder containing your HTML and the ‘Images’ folder and upload it to your host using an FTP client. Once uploaded, check if the remote files work in your browser.
- Check your page links in the live browser to see if it works properly. Check if the images display. If not, check your links and file locations.