PART 1: COMPOSITION
1.1 The coffee is the COI
- Frame a composition. Remember everything you’ve learnt about photography (exposure, focus). Take the 1st. image using aperture f/16 (increase ISO / add a light source if indoors). With tripod.
- Need to simplify the composition to draw attention to the COI? How would to do this?
- Take the 2nd. image with aperture of f/8. Clear the background of any distractions if you can. Decrease your depth of field by opening up the aperture.
- Take the 3rd. image with aperture f/5.6 (or wider).
- Consider the other tools of composition. Now that you’ve simplified your composition, how would you draw attention to your COI?
- Take the 4th. image, placing the COI on any of the power points (and in doing so, creating negative space).
- Take 03 more photos using the other power points. Which one do you prefer? Can you determine why?
- Make an intuitive composition that you like or find interesting without consciously considering any of what we’ve discussed. This aims to show you that sometimes just going with the flow can also produce good results.
You should have 8 images. Write a short paragraph on each, include:
- Camera settings
- What you like about the image?
- What you think you can do better?
- How you drew attention to the COI?
1.2 Portrait image with model
Shoot a full-length, 3/4 or just a head-and-shoulders portrait. Don’t use a wall as a background. Focus on the eyes. Apply what you’ve learnt about exposure and take your first portrait by placing your subject in the centre of the frame. The review the image:
- Can you make this centred composition better, for instance, by blurring the background more or changing the angle of the subject’s shoulders in relation to the camera? Experiment with changes; direct your model but continue using a centred composition. Keep your favourite image.
- Place your subject elsewhere in the frame (not in the centre). Consider where you place the negative space. Do you have anything distracting in that space? Make your image placing the negative space in front of your subject or where the line of sight of the subject is. Do you like this image?
- Make the next image placing the negative space behind the subject. Does it work for you? Can you think of instances where and how it might work well?
You should have 8 images. Write a short paragraph on each and include:
- How does the negative space in front of the subject vs behind the subject affect you as a viewer of the image? Which one do you prefer and why?
- The camera settings for each image.
- What do you like about the image.
- Make an intuitive composition that you like /find interesting without consciously considering any of what we’ve discussed. The aim is to show you that sometimes, just going with the flow can also produce good results.
1.3 Leading lines (indoors / outdoors)
- Identify and make 05 images using leading lines
- The camera settings for each image.
- Explain the lines you used (actual or implied), straight / curved, and your intentions when you included them in the image.
1.4 Symmetry (indoors / outdoors)
- Identify and make 05 images using symmetry
- The camera settings for each image
- What type of symmetry did you use?
PART 2: ADVANCED COMPOSITION & VISUAL DESIGN
2.1 Time to go hunting for shapes! You should have 10 images. Write a short paragraph on each and include the camera settings. For 2. and 4., describe how your composition draws attention to the COI.This activity will require some planning:
- Identify & photograph 03 triangular shapes in your environment.
- Make 02 images, using triangular compositions.
- Identify and photograph 03 circular shapes in your environment. Consider where to place them in your composition. Experiment with a partial circle in the composition, a centre placement & the rule of thirds. Which do you prefer?
- Make 02 images, using a circular composition.
2.2 Make 05 images with geometric shapes in nature. Write a short paragraph on each and include the camera settings. Identify the shape.
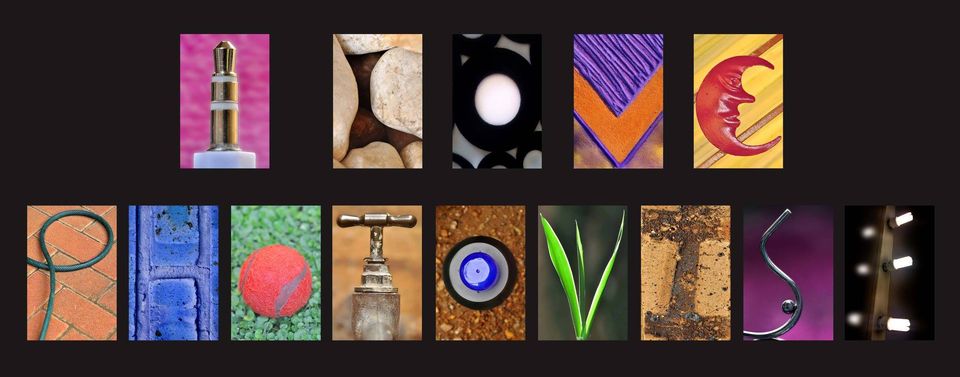
2.3 This activity is excellent for “switching on” your eyes for shapes and forms. Go hunting for letters – not actual printed letters but shapes in nature / your environment that look like letters. Write your name or a phrase. Use Photoshop to combine the individual images into one.
2.4 Our world is very colourful!
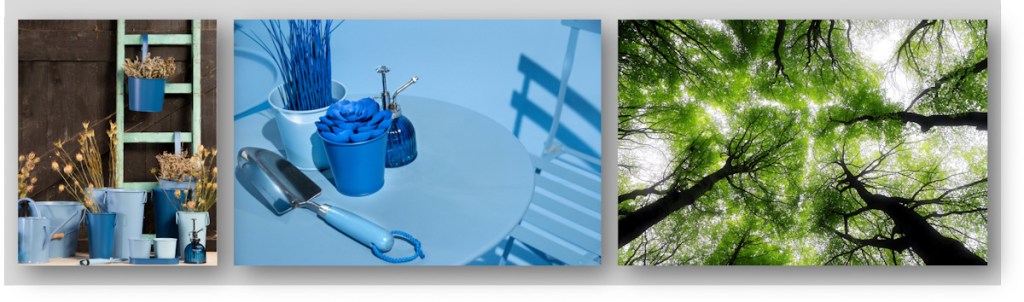
- Make 05 images with colour as the COI. Use opposite colours and complementary colours.
- Make 05 more images using colour to convey a specific emotional message (red is the colour of passion/danger, blue is peaceful).
2.5 Reflections (reflectional symmetry). Make 05 images of reflections (indoors/outdoors)
2.6 Make 05 images of conceptual contrast indoors (flat-lay images). Take a photo of an object from overhead. Create images showing conceptual contrast (old vs new, shiny vs matt, smooth vs textured, or contrast in shape (soft vs hard,..)). Describe the conceptual contrast (old and new).
2.7 Make 02 images of silhouettes.
2.8 Make 05 images of colour contrast.
2.9 Lock yourself and your camera in bathroom for 30 minutes. Find any design elements we’ve discussed and apply any of the design principles we discussed. You can use your favourite lens to make 15 great images.
PART 3: BREAKING THE RULES & DEVELOPING YOUR OWN STYLE
3.1
- Find a plant / flower to photograph. Take note of your first approach to the subject. If you instinctively want to photograph it from a specific angle, change that perspective intentionally (can photograph from the top, bend to photograph it at a lower angle or lie down and photograph it from the bottom). Make 05 images of various subjects, photographing from unexpected angles.
- Find a pet / child to photograph. Follow the same process and photograph from a different camera angle than the obvious. Make 05 images.
You should have 10 images. Write a short paragraph about your experience. Include the camera settings for each image. What do you like about these images?
3.2 Choose any 03 of the 07 rules to be broken and make some images breaking the rules. Always shoot the first image following the “rule” and then break it in the following image. You should have 06 images. Write a short paragraph identifying the rule to break and what you believe you achieved by breaking that particular rule. Include the camera settings for each image.
3.3 Photograph in the garage/bedroom. You have 15 minutes to produce 15 photographs in that space with the following requirements:
- Stay in the same space.
- Do not stage or set-up an image. Shoot what is there as it is there.
- Try to focus on things that generally escape your attention, like the folds of the bedspreads (bedroom), the way the stairs may be worn going down to the basement, the stains on the garage floor. Look for texture, lines, shapes, forms rather than “things” to photograph.
You should have 15 images. Write a short paragraph & include your camera settings for each image. In the paragraph, contemplate this: Did you find that you tend to notice certain things more than others? Perhaps you are prone to notice textures and shadows before seeing anything else. Or, do you possibly love colour or contrasts? Do you recognise anything which might be an indication of your unique style?
3.4 Using Google, research a few well-known photographers. Include some of the masters, such as Ansel Adams, Freeman Patterson, Annie Leibovitz and those listed in the course material. Identify a photographer to inspire you. Make 05 images taking inspiration from them, indoors or outdoors. Include your camera settings for each image.
In the paragraph, explain what inspired you. How did you apply this inspiration in your own work? What is your vision going forward?
PART 4: VISUAL LITERACY
4.1 Create 03 candid and 03 set-up images showing your command of storytelling techniques. You should have 06 images. Write a short paragraph on each, include the camera settings for each image. Briefly discuss the story you intended to tell and the elements or principles you used to achieve that. Do you think you were successful?

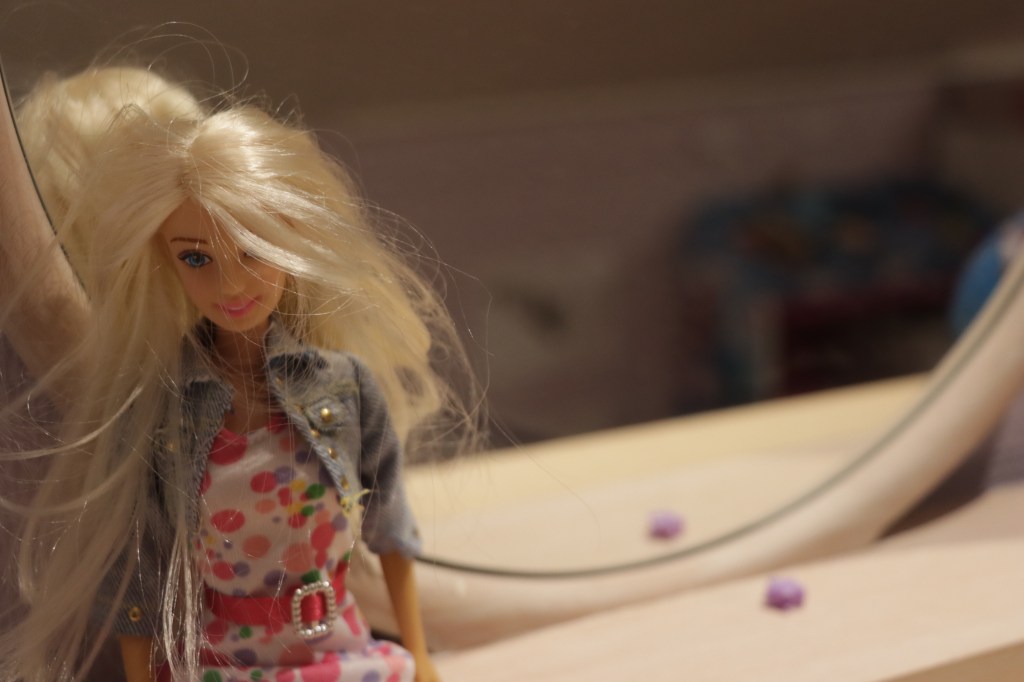

A. “LOL” doll is my daughter’s favorite, a 6 years old girl. I forced her to go to bed right away when I saw her still there playing and waiting for sleeping with me. Bedtime is always a bit of a mother-daughter chat before she falls asleep. But these days I was too busy, she was upset with me, so she didn’t bother to put the dolls on the shelves like before, but left them on the floor, went to bed and cried until she fell asleep. I was also under pressure from work, and a full-time student. Without my husband I think I cannot continue my study. Looking back at this picture, I feel very sorry! I promise to make up for her after completing the exam. (iso1600, f/4.5, shutter speed 1/15s, without tripod). Following “the Shallow depth of field”, I break the rule “Rule of thirds” to focus the doll in the middle. I set the iso1600 for making the photo brighter in low light condition.
B. The mirror shelf is empty, there was only one barbie girl, she was upset and doesn’t bother to put the dolls up anymore. (iso1600, f/4.5, shutter speed 1/30s, without tripod). Following “the Shallow depth of field”, I used “Rule of thirds” to focus the barbie girl on the left. The iso was set 1600 for making the photo brighter in low light condition.
C. While I was crying, I accidentally saw the colorful balls in the small playgournd in the room. This naturally made me feel better and think positively. Children must always live in joy and full of happiness like the colors of these balls. (iso1600, f/4.5, shutter speed 1/20s, without tripod). I used the colour “Contrast“ to focus the whole colourful balls in full frame. The iso was set 1600 for making the photo brighter in low light condition.
4.2 This is a historical picture taken by Josef Koudelka in August 1968 in Prague, Czechoslovakia.
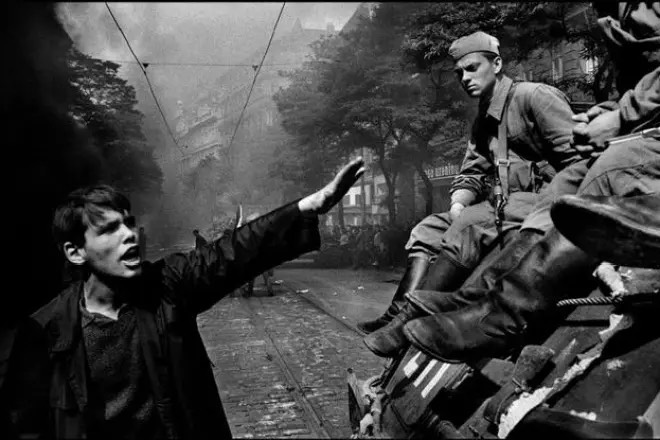
Photo credit: Josef Koudelka
- (Remember) Recall what you already know about photography – include key terms and concepts.
- (Understand) What do you see in the photograph? What words would you use to describe the image? What is the genre of this photograph?
- (Apply) What does this image remind you of? Which formal elements seem important? How would you describe the lines in this picture? The shapes/forms? The colours/tones? The textures and patterns? How has the photographer captured the play of light in this image? How is space represented in this photograph (foreground, middle ground, background)?
- (Analyse) Which part of the photograph strikes you as most interesting – captivating, surprising, puzzling, mysterious? Why? What can you discover about this image and this artist’s work through research? How does this new knowledge affect your understanding of the work?
- (Interpret) What title would you give to this photograph? What made you decide on that title? What other titles could we give it?
- (Evaluate and create) What do you think is effective about this photograph? What doesn’t work so well? What have you learnt from exploring this work of art?
4.3 This time, ignore the historical context or any other context which is not in the image.
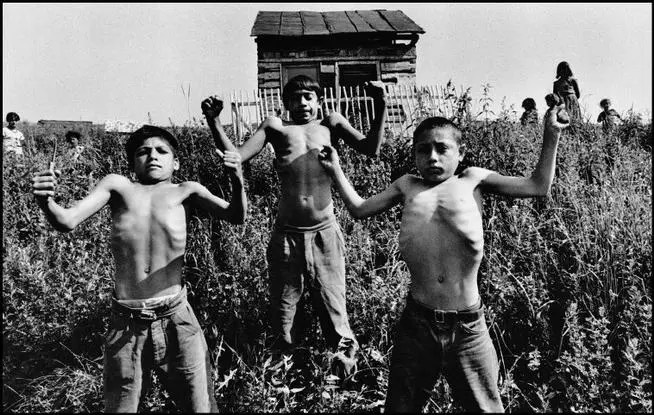
Photo credit: Josef Koudelka
Tell the story based only on what you see in the image. Consider all the elements, but include your emotional responses. Could you relate to the image, or did the image stir some of your memories?
Use the same five-step framework from the previous assignment: Remember. Understand. Apply. Analyse (but ignore historical context). Interpret. Evaluate.
Now, create a photographic response to this image. What did you choose to create and why?
